Absence Guide – Redwood
Last Updated: 04/16/2026
You will use the Absence tile to request all of your leave.
Non-exempt (hourly) employees will no longer enter your leave on your time card.
Absence Balance
Go to Me. Your dashboard may look different from the dashboards of other employees depending on your role and level of access (security).
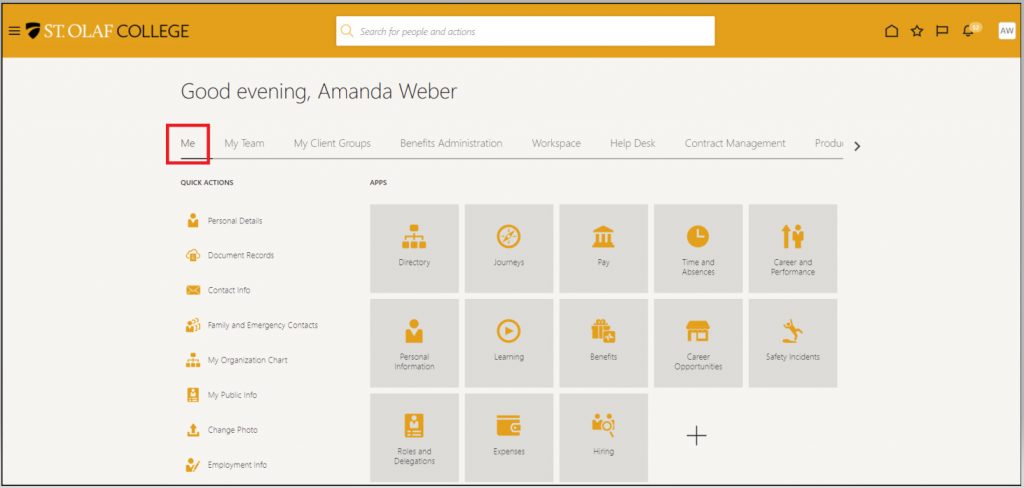
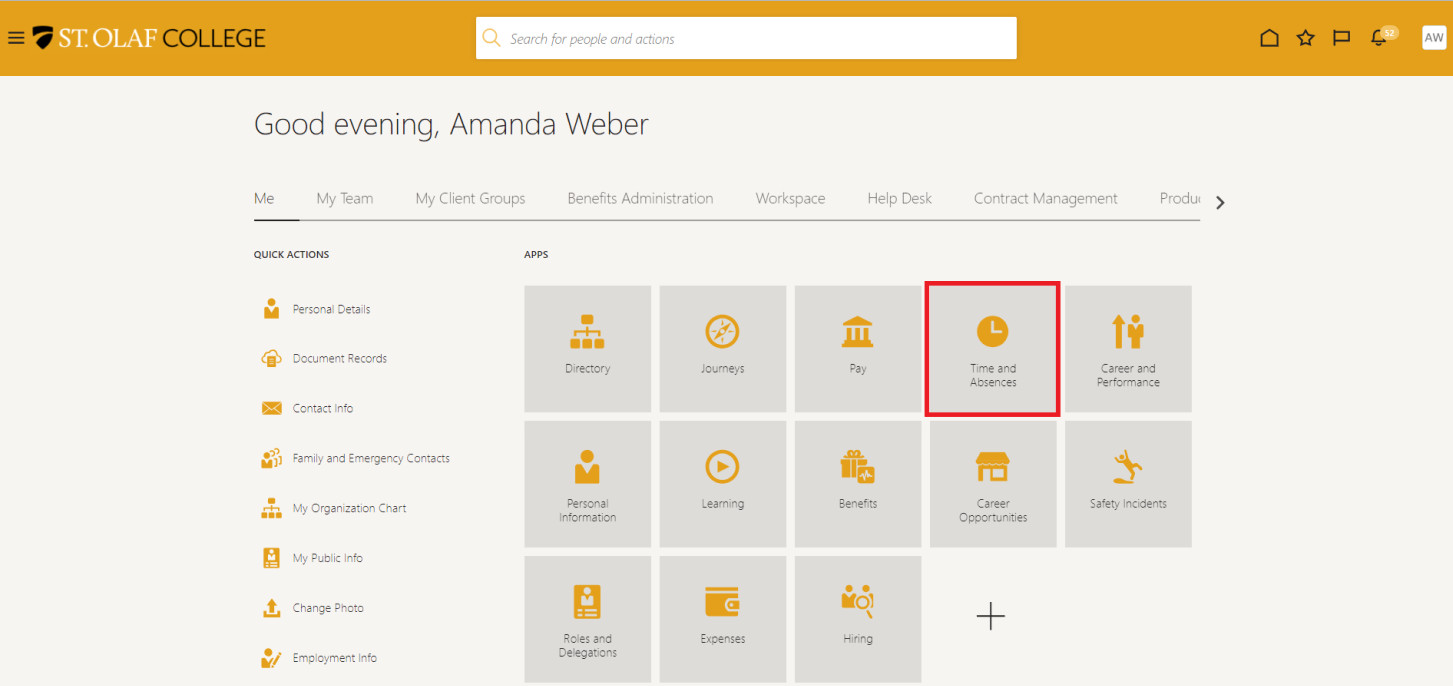
Click on “Time and Absences.”
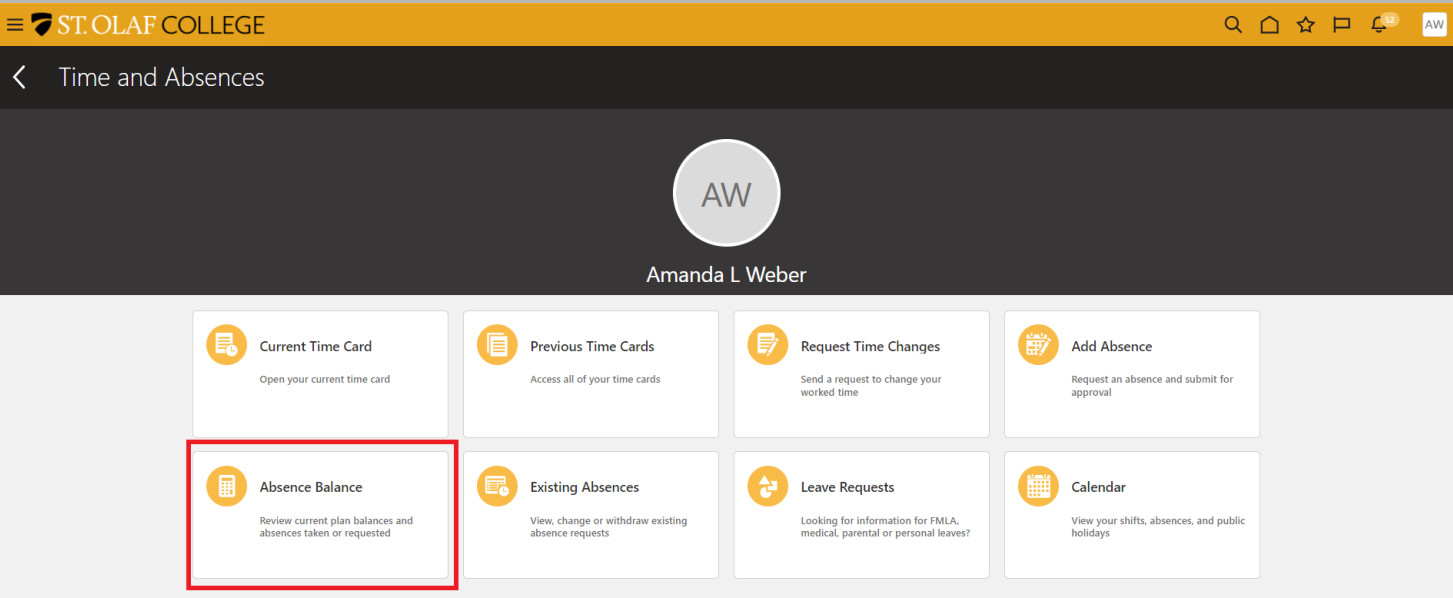
Click on the “Absence Balance” tile to view your Absence Balance.
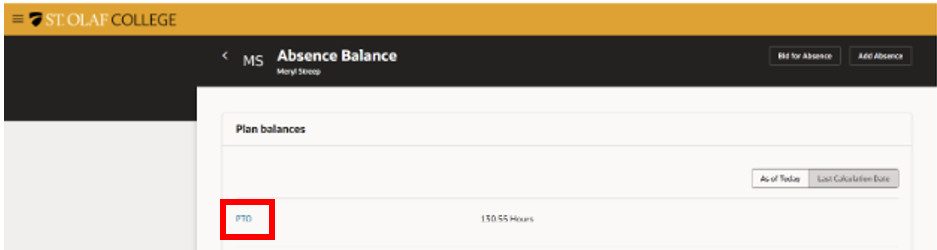
You will see a list of the “Plan Balances” for the types of absences for which you are eligible.
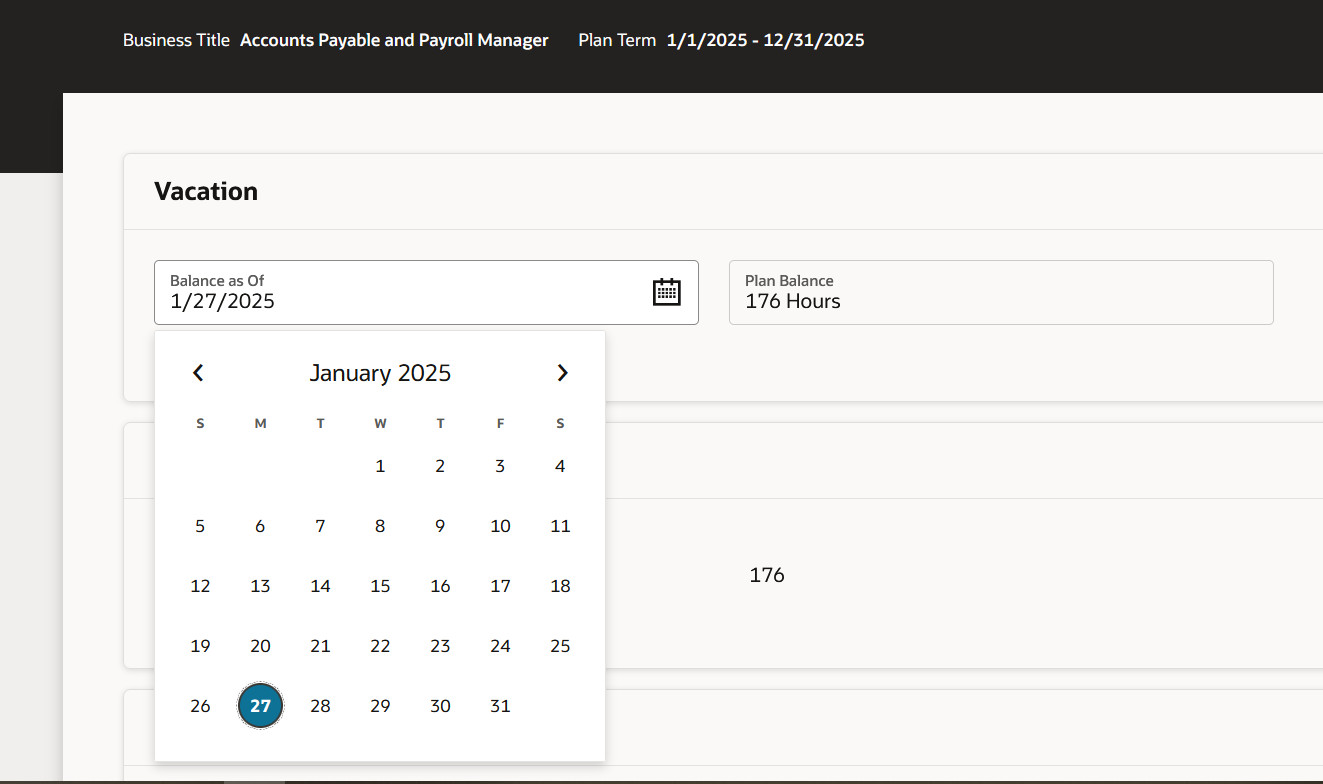
Click on a blue link (i.e., “PTO”) to view your usage and accruals.
You will see a summary of the number of hours for the absence plan you selected.
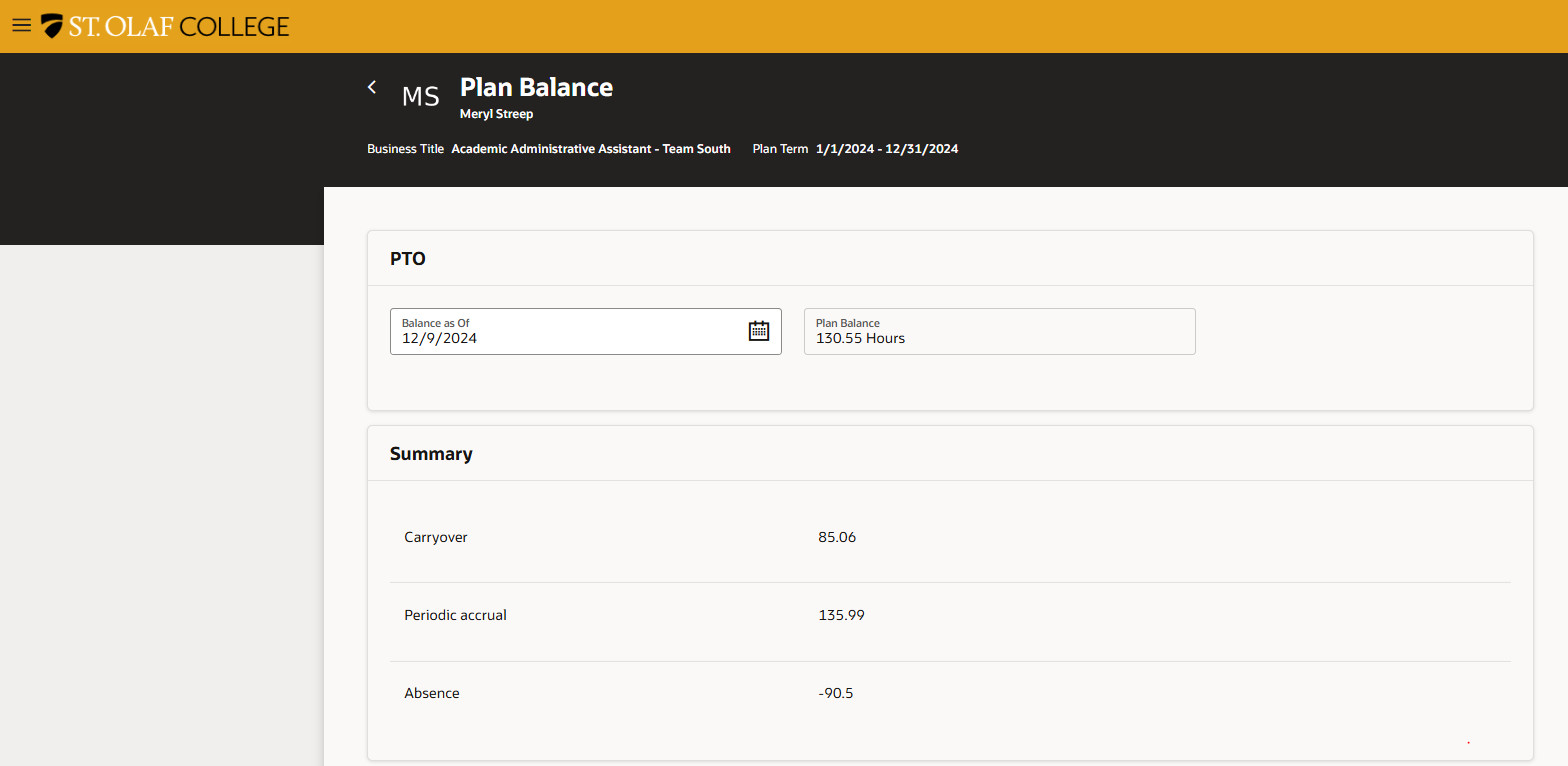
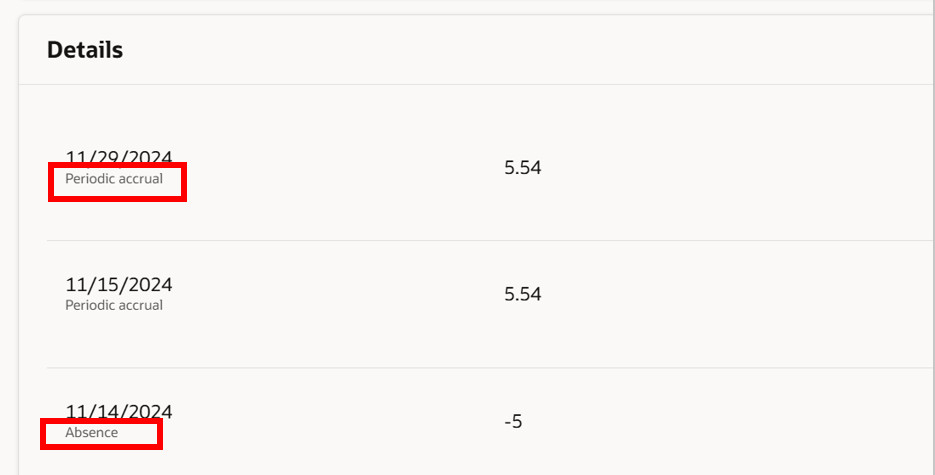
To view additional information about accrual and usage, you can change the effective date back to a prior date, scroll down to view from “Details.” You can read about accruals under “Absence Requests” below.
In the Details screen, you can see whether you have reached the maximum accrual and if you are now losing PTO or Vacation time.
View Employee Leave Balances – Supervisor
Go to “My Team.”
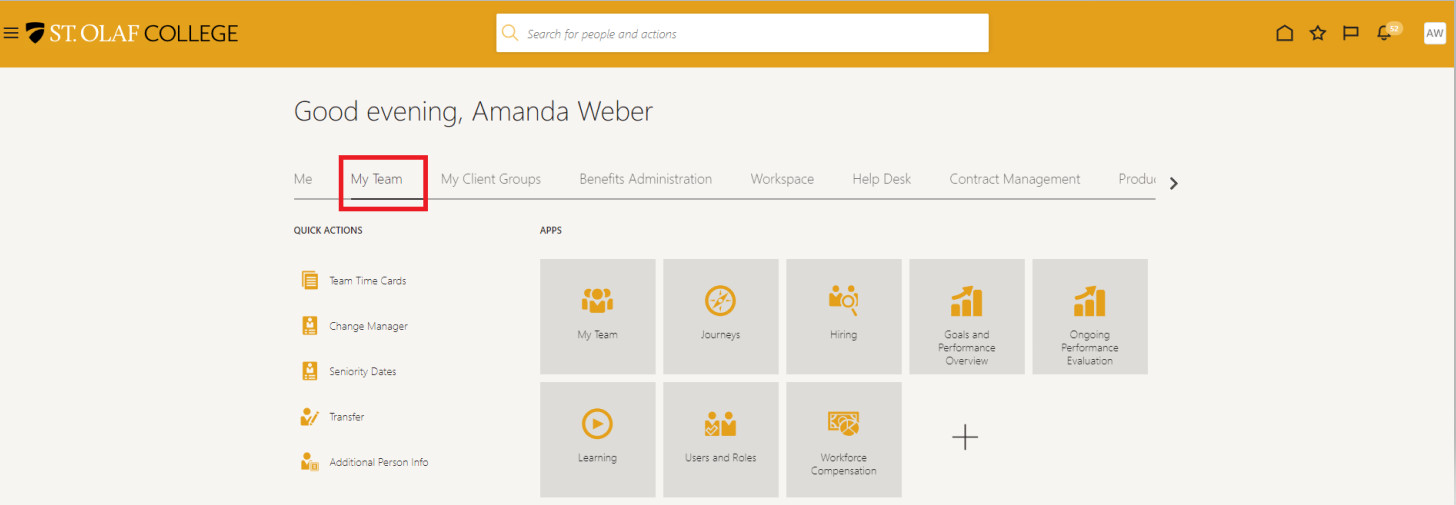
Click the three dots to the right of the employee’s name, and select “Absence Balance.”
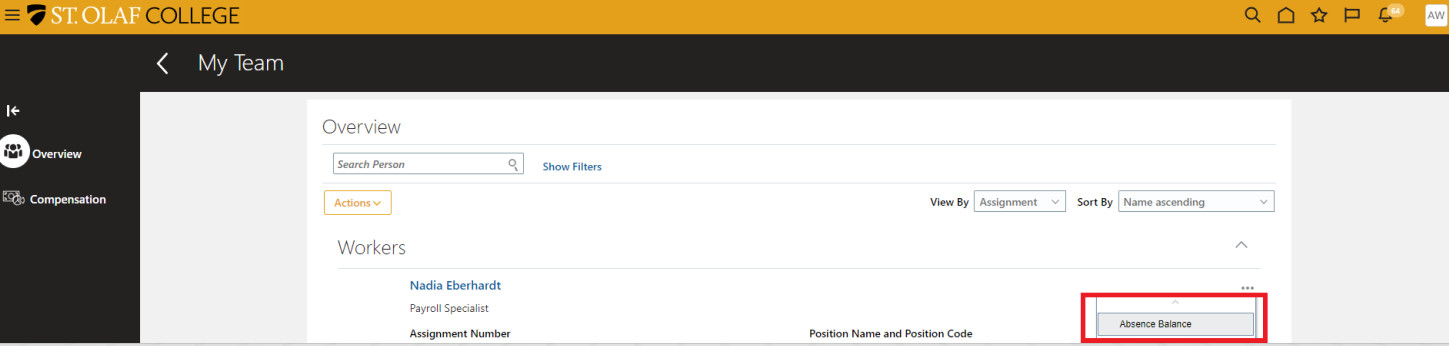
The “Absence Balance” screen will display the balances for all of the employee’s leave plans.

Absence Requests
Go to Me. Your dashboard may look different from the dashboards of other employees depending on your role and level of access (security).

Click on “Time and Absences.”
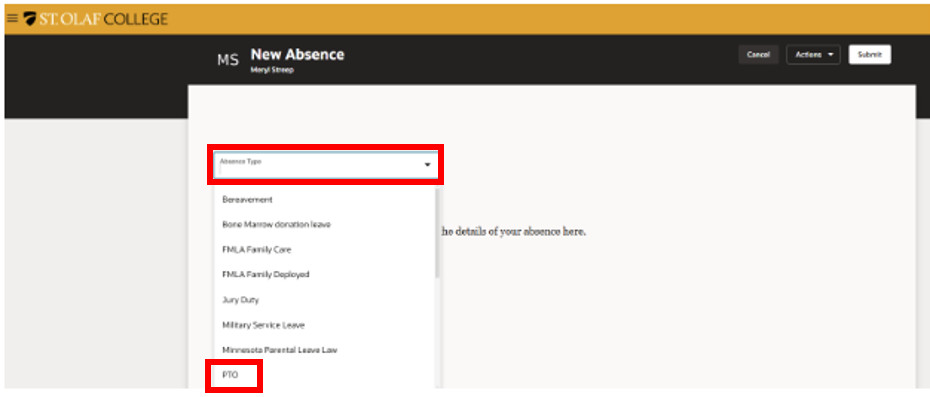
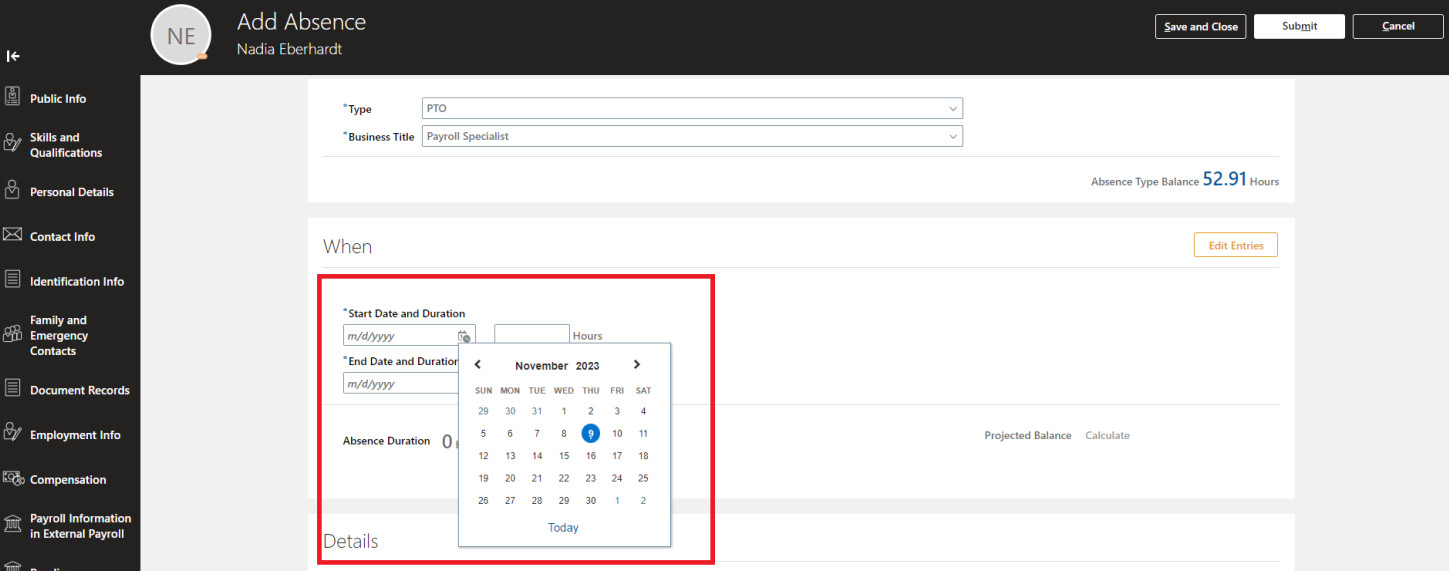
On the “Time and Absences” screen, click on “Add Absence” to request time off.
Absence requests can be in any increment of time.

You will see the “Add Absence” screen and a dropdown menu with types of absences. Scroll through the list, and click on the type of absence you want to select.
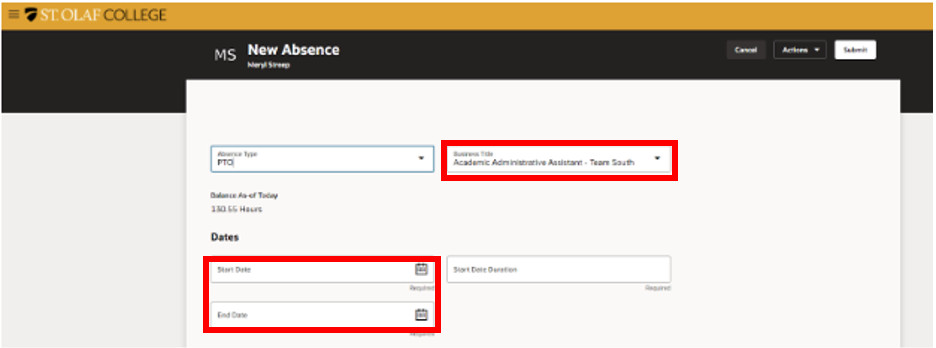
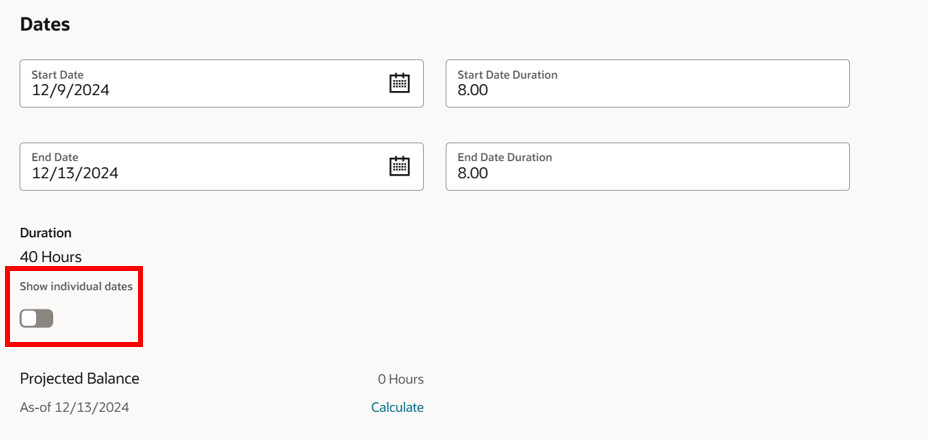
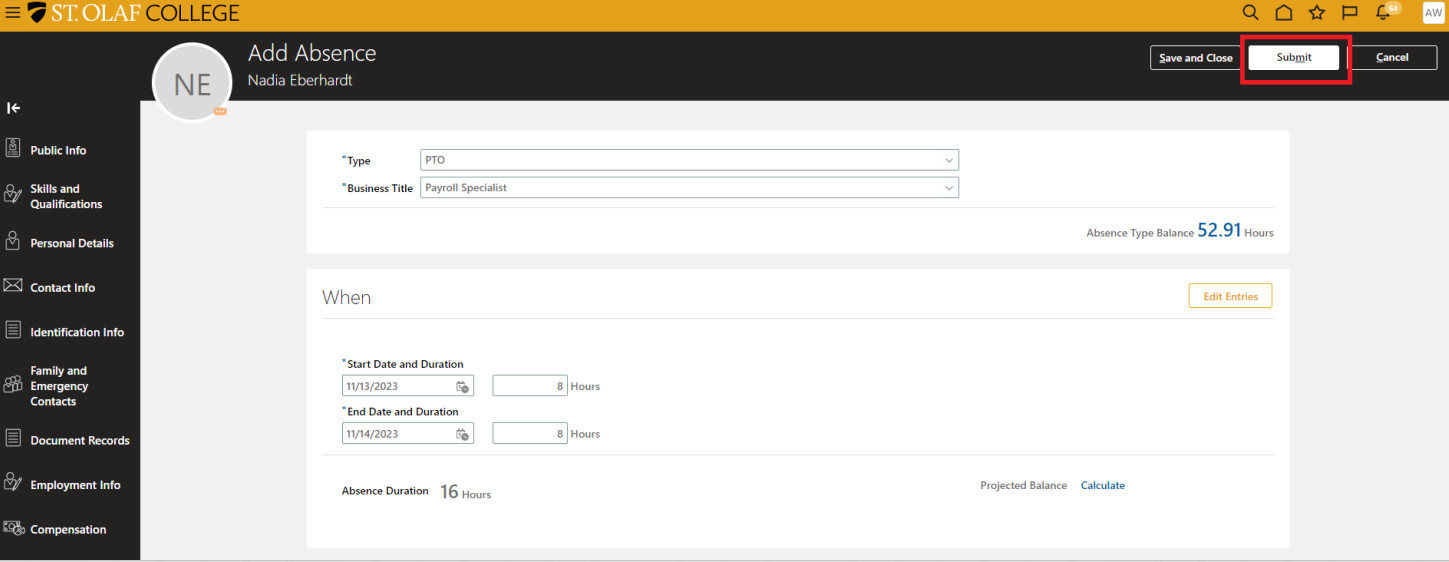
For all absences, you must enter a Start Date and an End Date.
The system has a built-in work schedule and will try to match the dates you’ve selected with the hours you would typically work. To edit these hours, type the actual hours into the “Hours” field.
Note: If you have more than one assignment (job), you can have the absence tied to only ONE of your assignments.
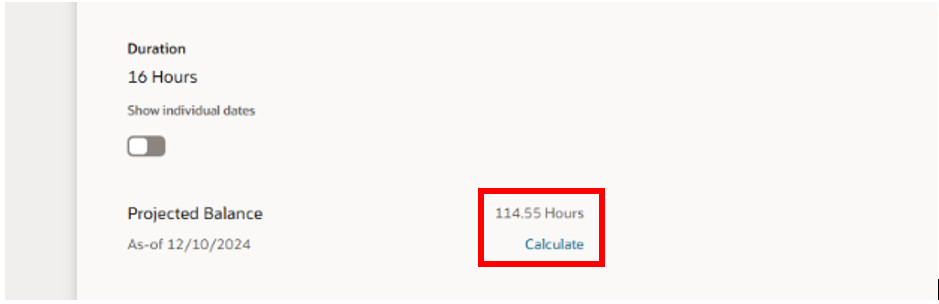
After entering your hours, select “Calculate” to view your new projected balance.

If you click “Calculate” without editing your hours, the system will still give you a projected balance.
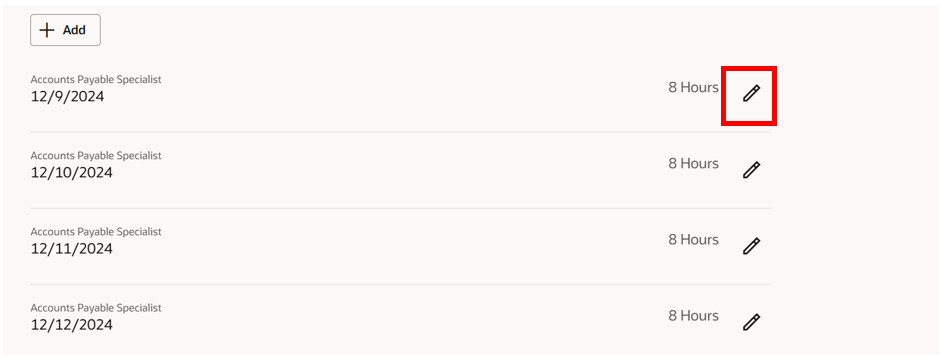
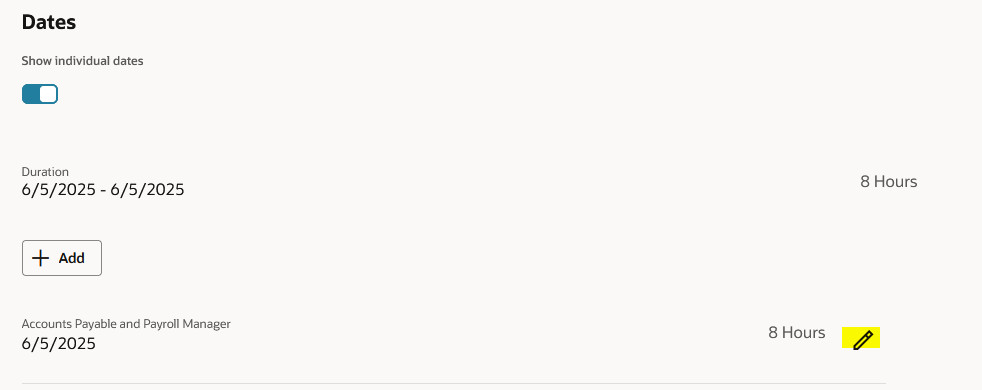
If you have entered a date range for your absence, you can move the slider to show individual dates to customize your absence hours.
Use the “pencil” icon to edit individual days of your absence.
When you request absences in advance, the system will factor in the accruals that will occur between the date that you’re logging the absence and the date of the actual absence.
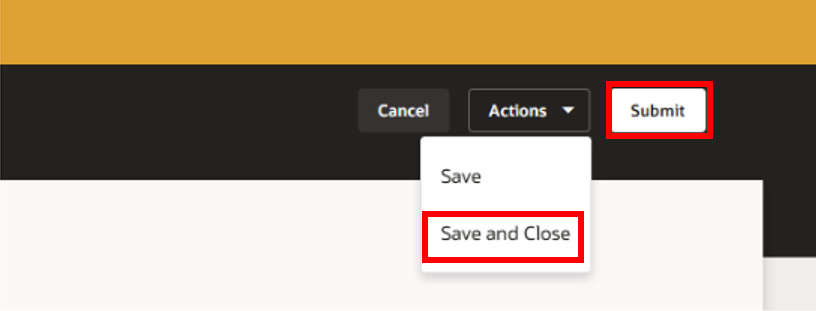
After you’ve entered your absence request, click “Submit” at the top right hand corner of your screen. Your absence request will go to your supervisor for approval.
If you want to save your absence request but not submit it to your supervisor just yet, click “Save and Close.” If you do not submit your request, the absence will not be applied to your paycheck.
Absence Requests – Summer Hours
Follow instructions under Absence Requests.
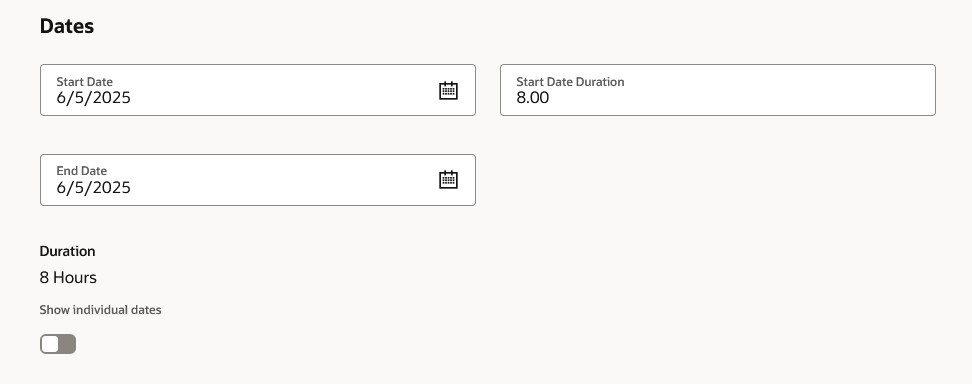
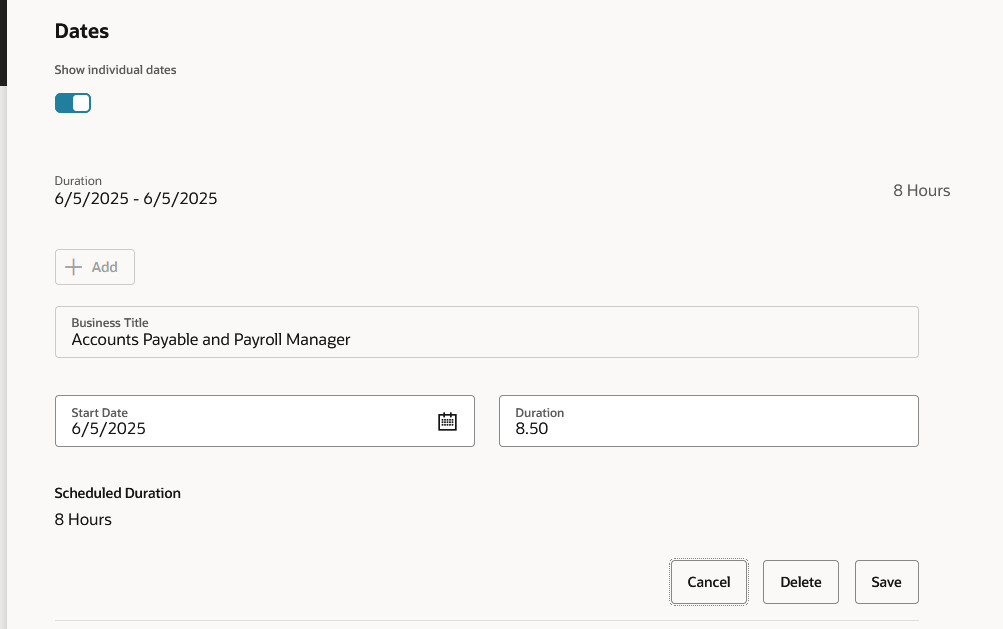
To adjust the standard 8 hours to 8.5 hours select Show Individual Dates and Click the Edit Pencil:
Change the 8 hours to 8.50 Hours and click Save. Be sure to Submit as normal.
View Requested Time Off
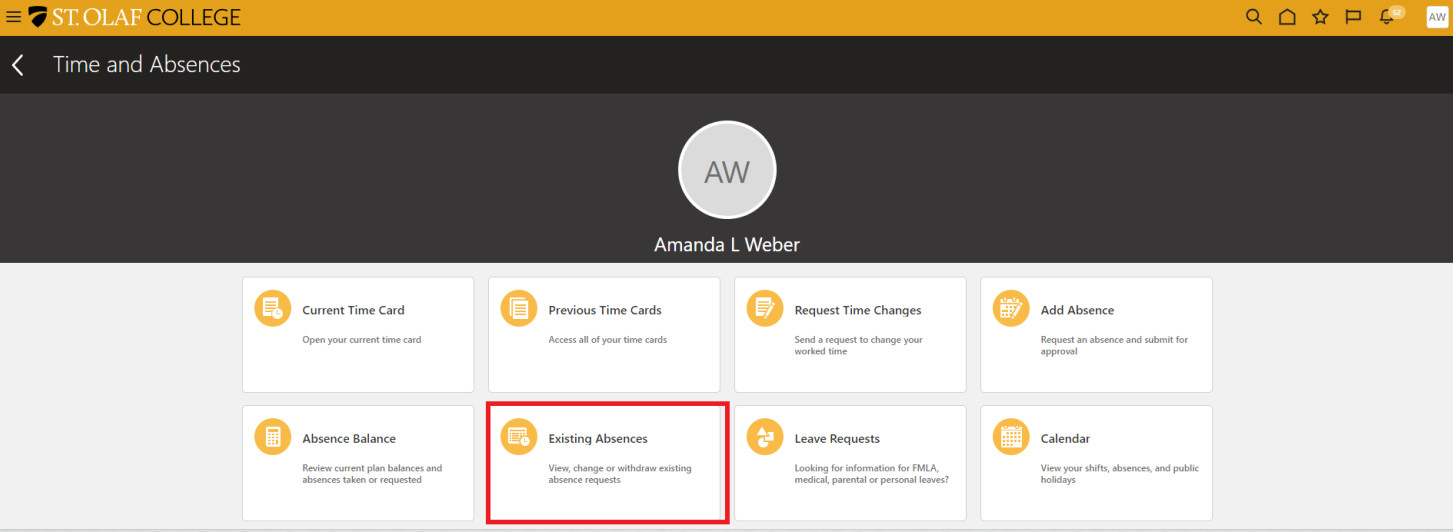
Go to Me. Your dashboard may look different from the dashboards of other employees depending on your role and level of access (security).
Click on “Time and Absences.”
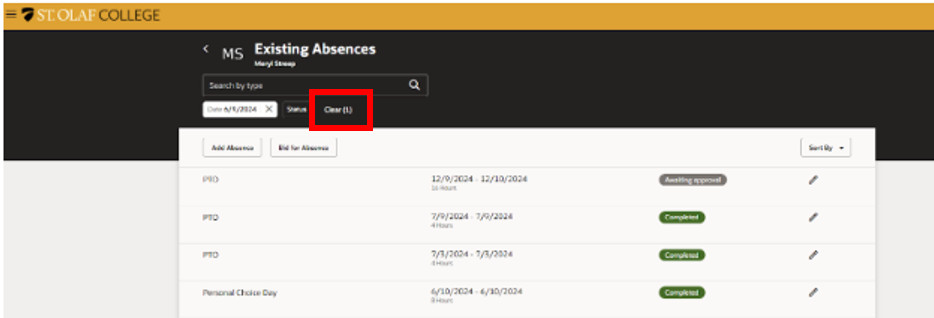
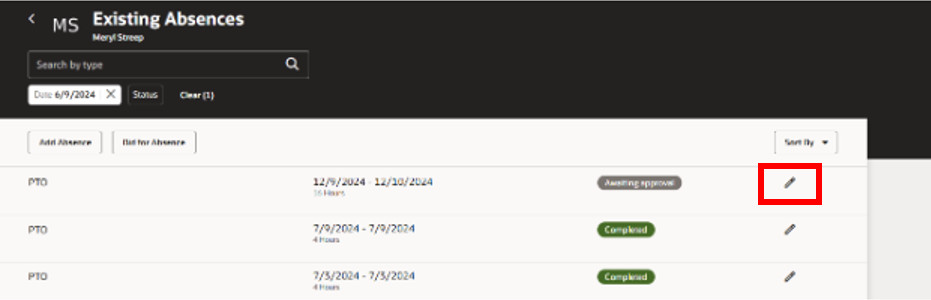
Click on “Existing Absences.”
On the “Existing Absences” screen, Clear the filters if you need to see more dates.
NOTE: Oracle will not show ANY of your absence requests before December 16, 2023. You will need to ask Payroll for this information.
Cancel a Requested Absence
Go to Me. Your dashboard may look different from the dashboards of other employees depending on your role and level of access (security).
Click on “Time and Absences.”
Click on “Existing Absences.”
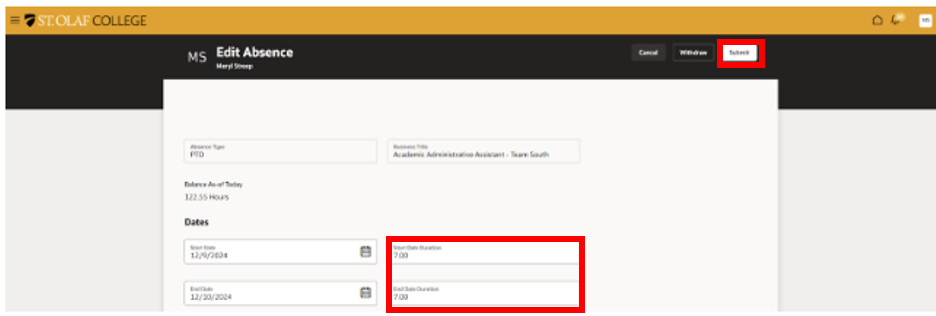
Click on the “Pencil” icon next to the absence you’d like to cancel or correct.
For example, if you submitted an absence request for “Sick” that should have been “PTO” or “Vacation,” delete the original request and submit a new absence request.
Edit your hours, and click “Submit.”
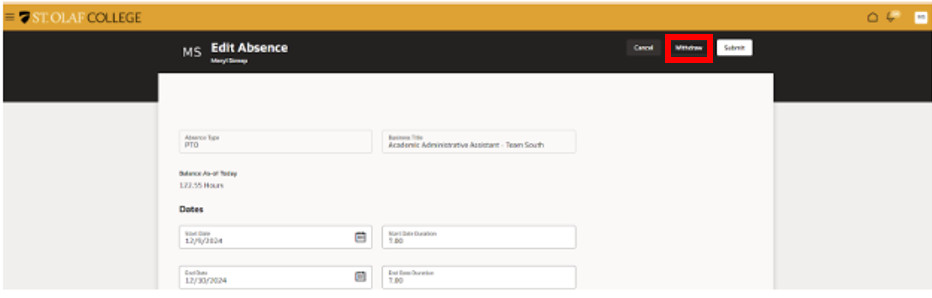
If you need to remove your absence request completely, click the “Withdraw” button in the upper right hand corner of your screen.
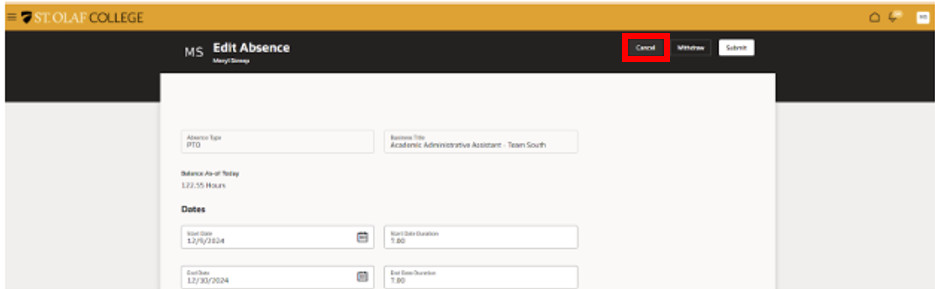
If you’re in “Edit” mode and you decide that you don’t want to change anything, click “Cancel.”
Notification of Approved or Rejected Absence Request
If your supervisor rejects your absence request, you will receive a notification on the bell icon on the upper right hand corner of your screen. Click on the number, which will lead you to the list of notifications.

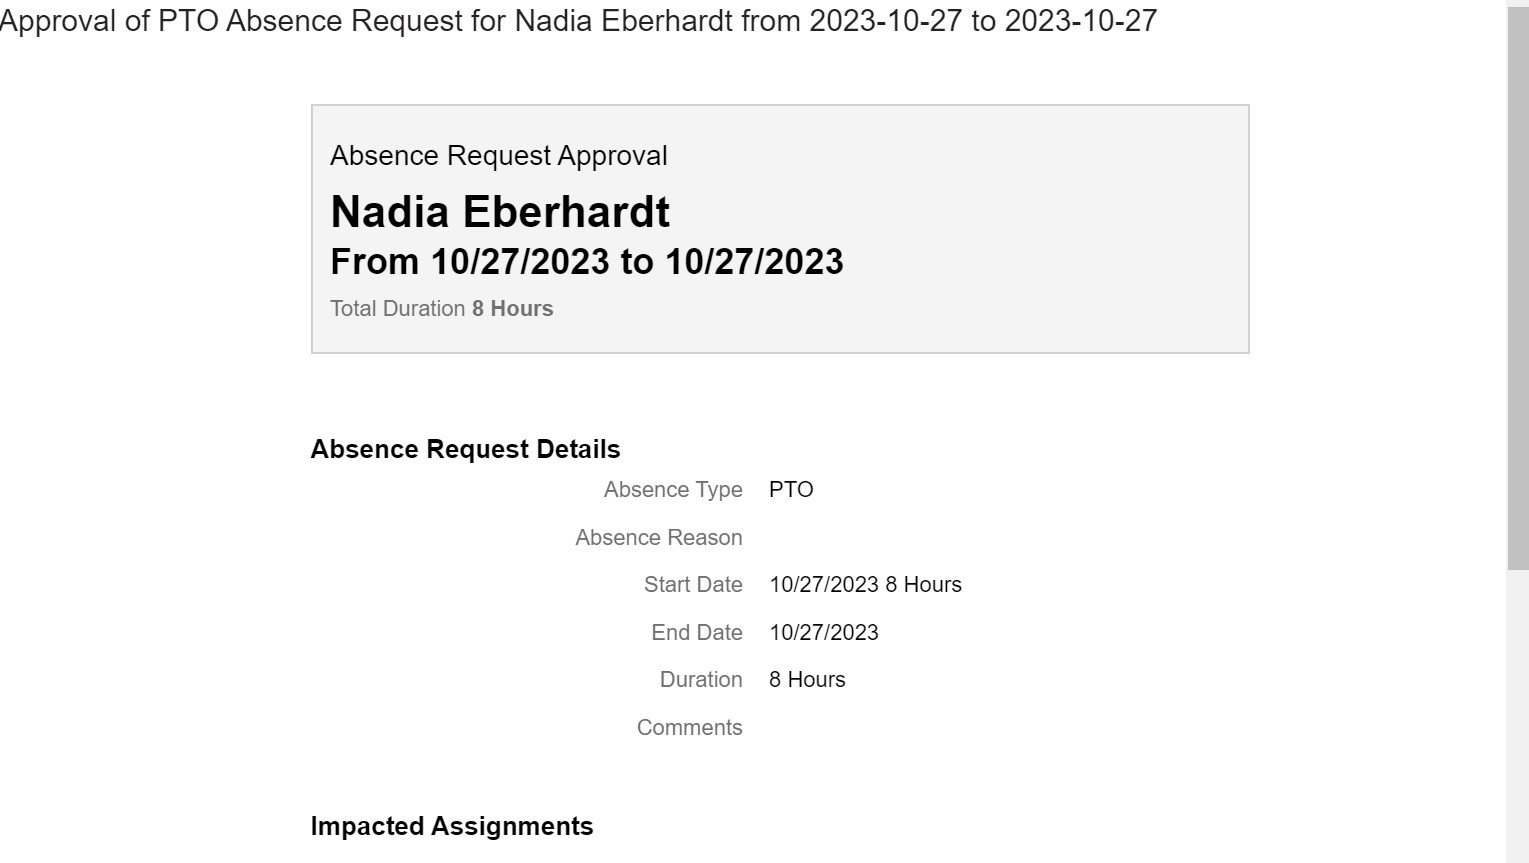
Click on the notification, which will show the status of the request.
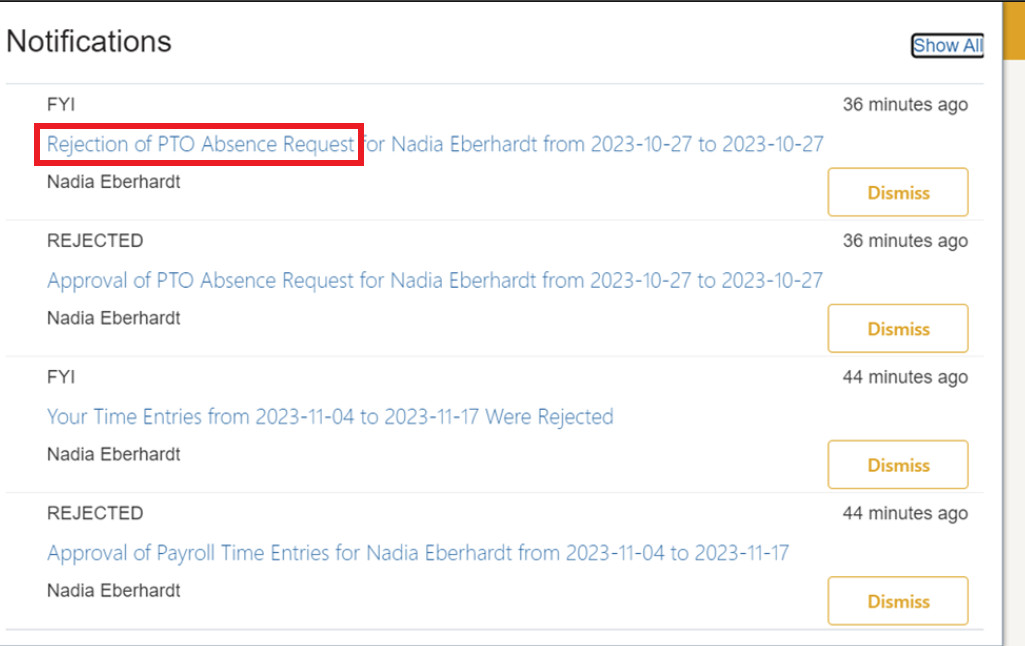
The notification of approval or rejection will look like this:
Manage Absence Requests – Supervisor
View an Absence Request
Navigate to “My Team.”
Approve or Reject an Absence Request
You as a Line Manager (supervisor) will receive a notification and email.
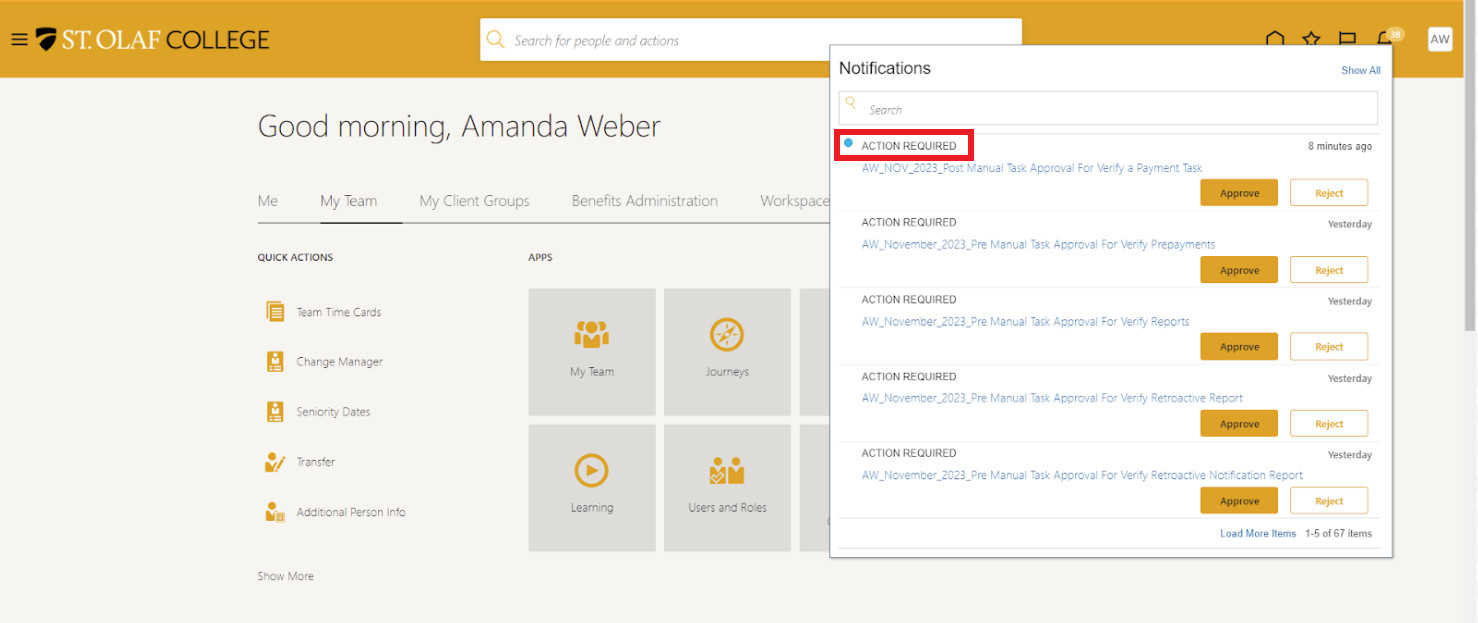
Click on the notification, which will open a new window.

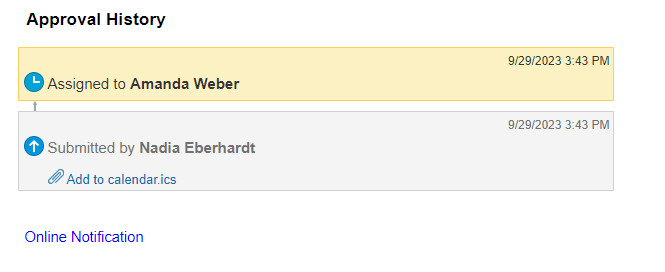
You can view the “Approval History” at the bottom of the window.
Click on “Actions” to view other steps you may want to take. You can “Request Information” about the absence, “Delegate” your approvals, or take other “Actions.”
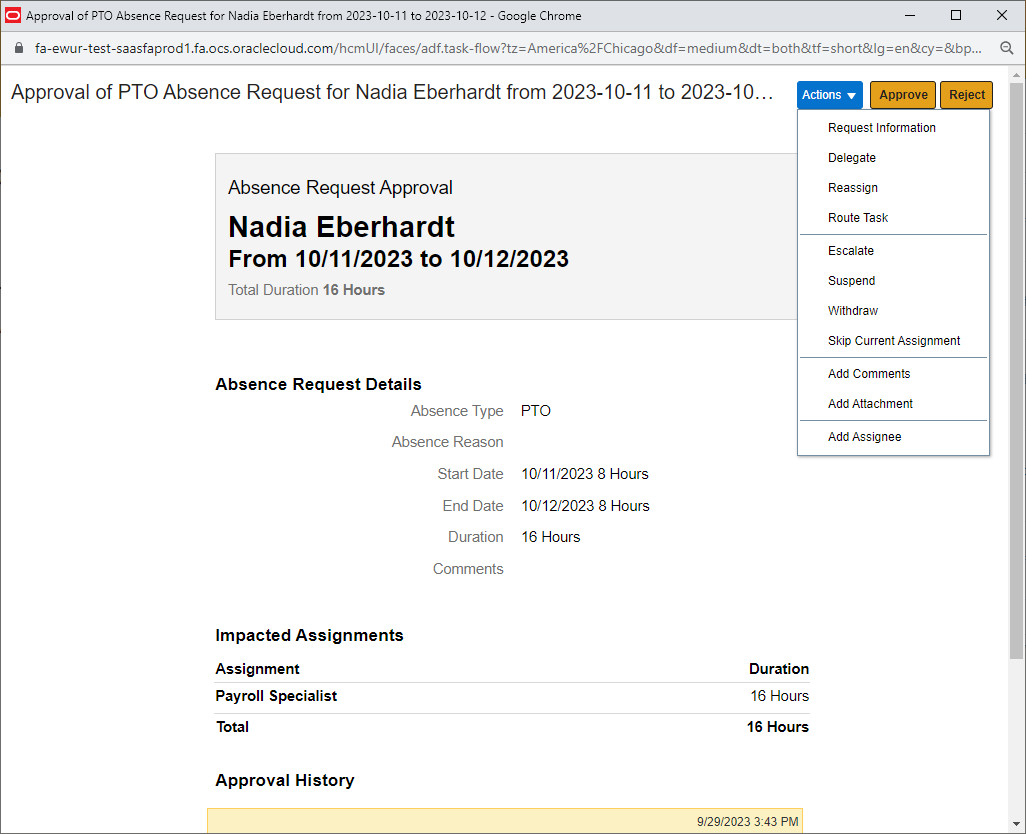
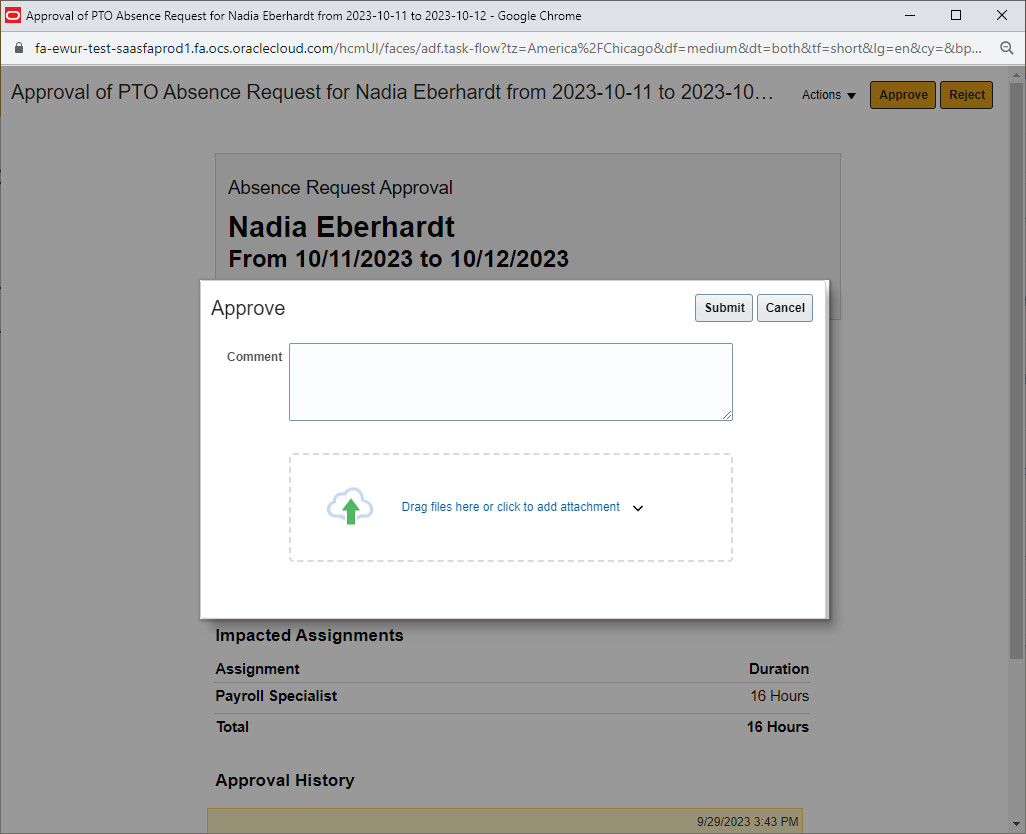
To approve the Absence Request, click “Approve.” When the “Approve” pop-up appears, click “Submit.” You do not need to include a comment.
To reject the Absence Request, click on the number on the bell icon, which will take you to the list of notifications. Click on the notification, and when the window appears, click “Reject.”
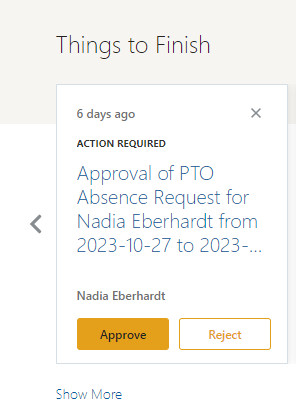
You can also scroll to the bottom of your dashboard to your “Things to Finish” tiles. Find the task with the Absence Request, and click “Reject.”
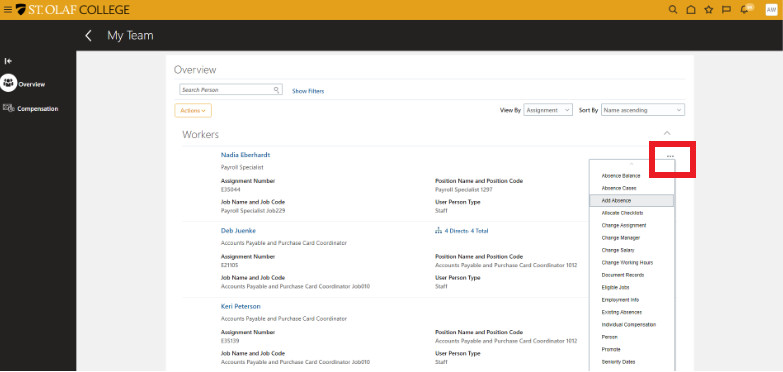
Enter an Absence for an Employee
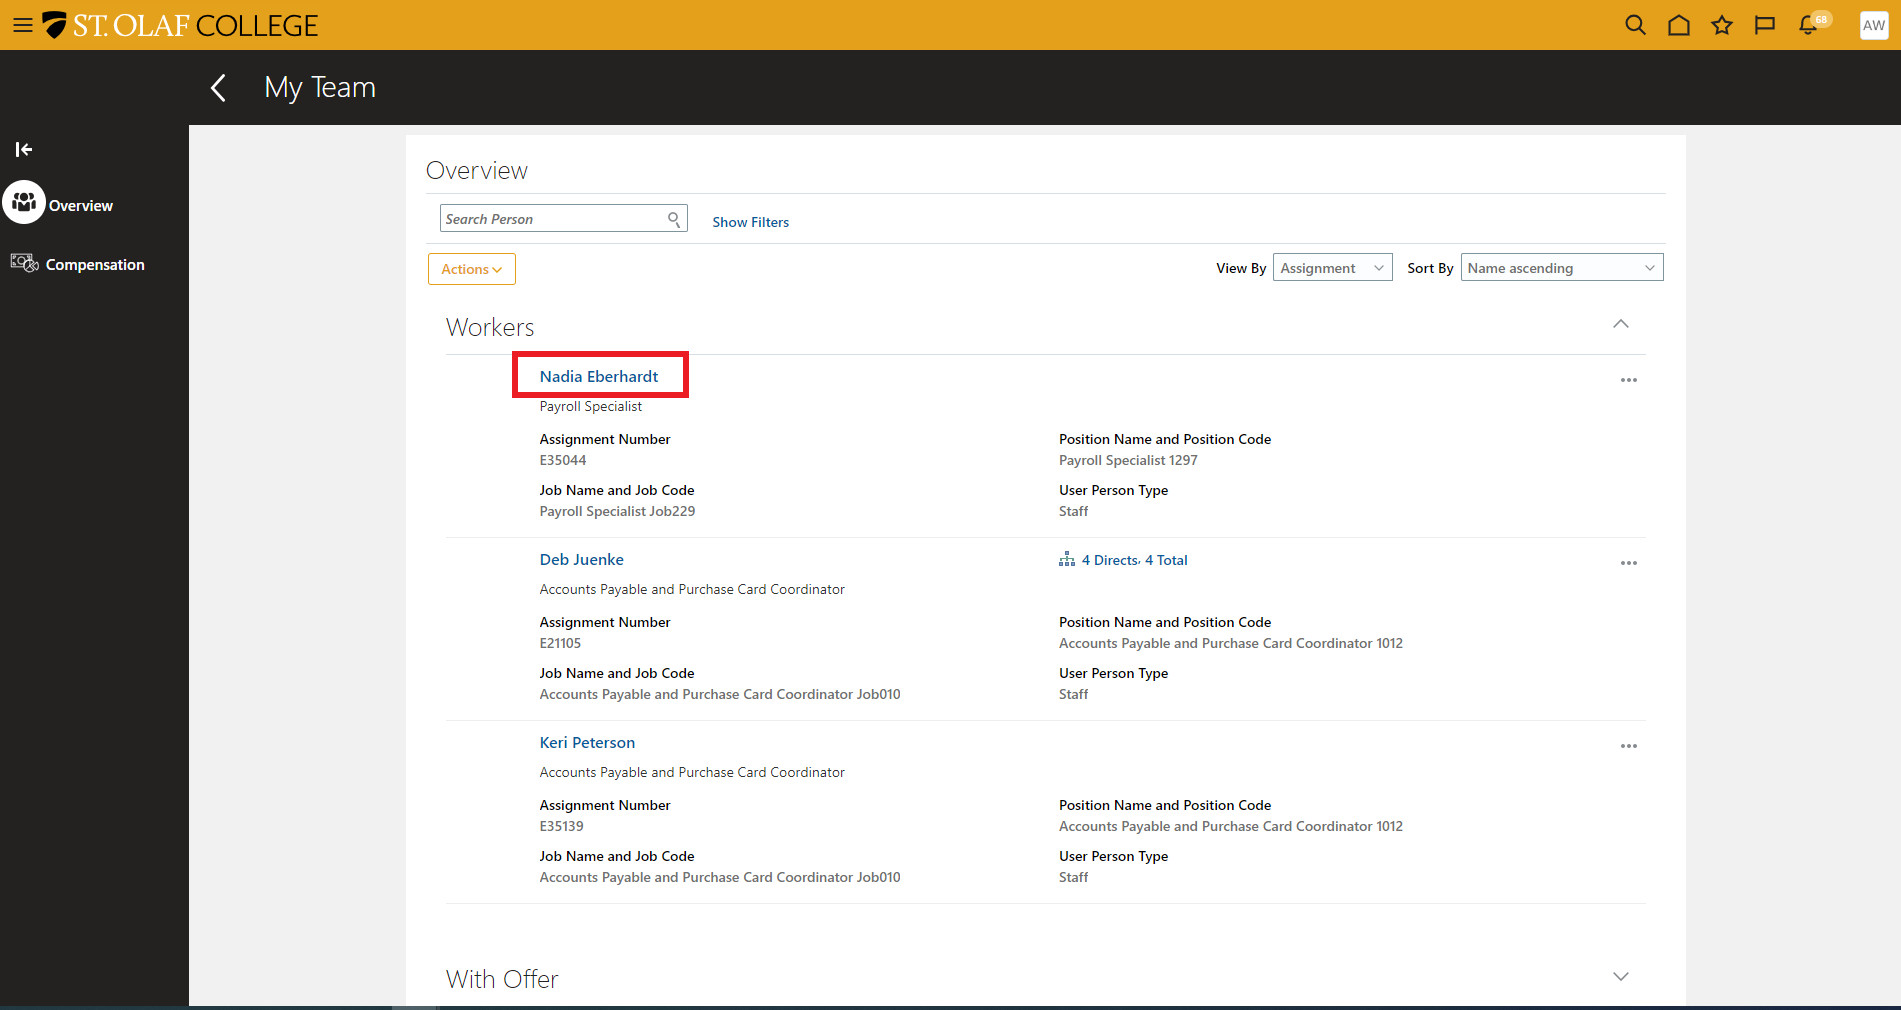
Go to “My Team.”
Select the employee for whom you want to submit an Absence. Click on the three dots to the far right of the employee’s name. Scroll down and click “Add Absence.”
OR click on the employee’s linked name (in blue) to view the employee’s profile.
You will see the “Employment Info” screen for the particular employee. On the far left of your screen under “Employment Info,” click “Show More.”
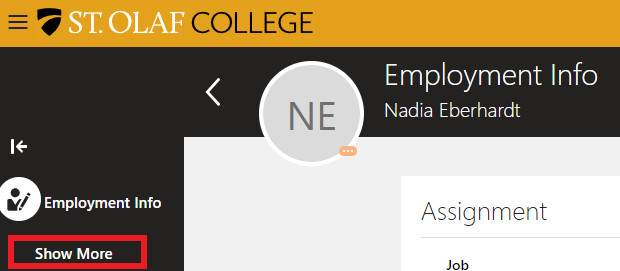
From the list that appears, scroll down and click “Existing Absences.”
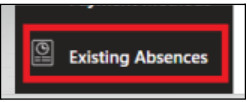
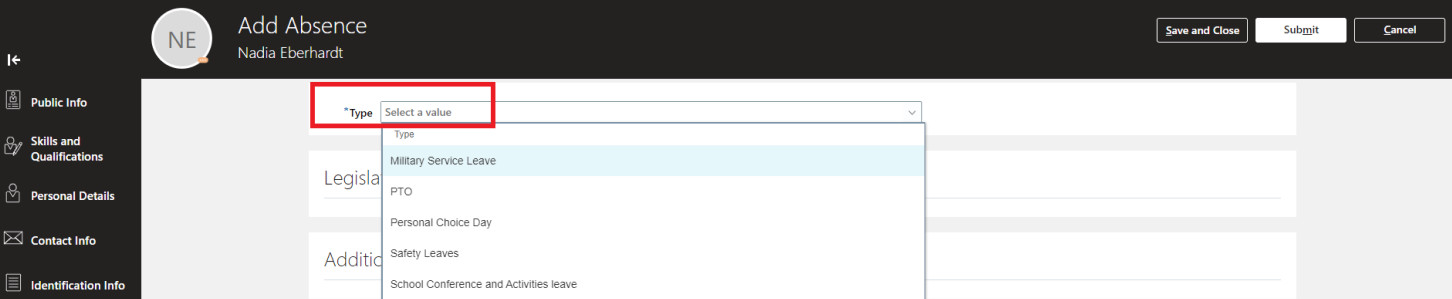
Click the “Add” button, which will take you to the “Add Absence” screen.

Select the “Type” of absence.
Add the “Start Date” and the number of “Hours.”
Click the “Submit” button.
Personal Leave
If you need to take leave under the Family Medical Leave Act (FMLA) or Paid Family and Medical Leave (PFML) please speak with Human Resources. You cannot initiate FMLA or PFML leave in Oracle.