Time Entry – Redwood
Last Updated: 04/16/2026
Navigation path: ME → Time and Absences → Current Time Card
From “Me,” click on the “Time and Absences” tile.
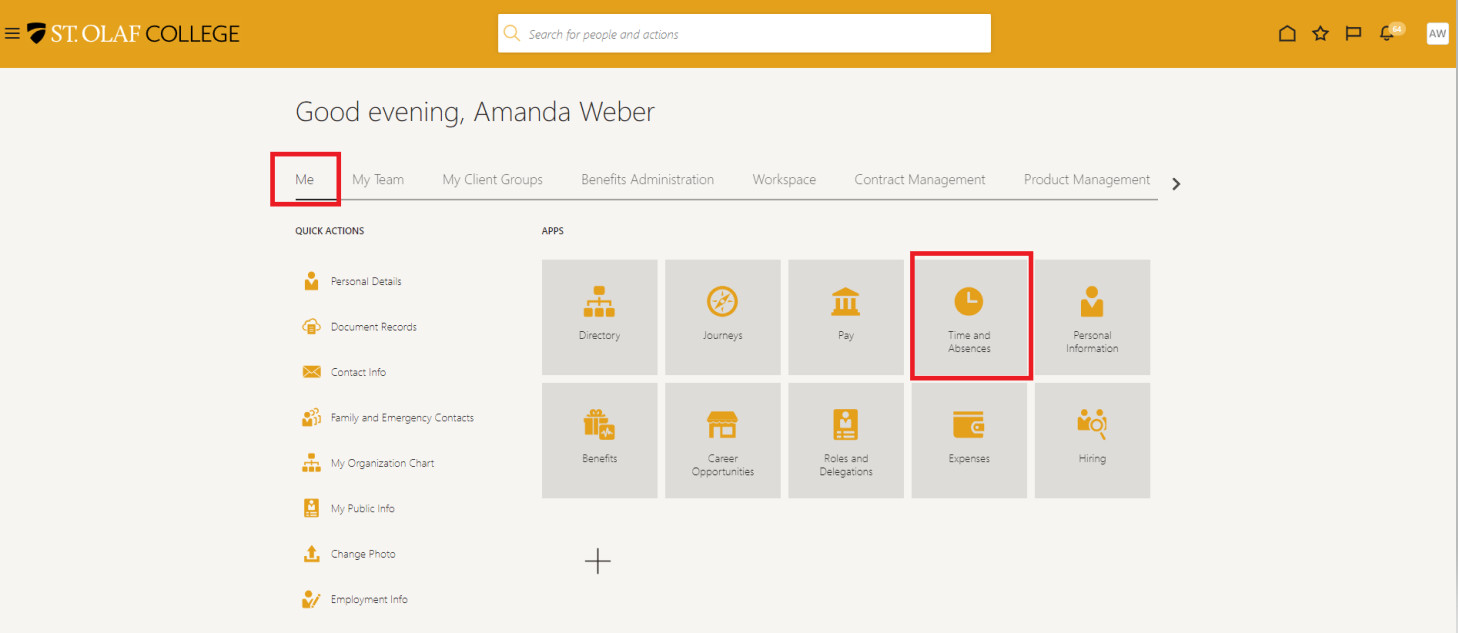
Click on “Current Time Card.”
If you are an exempt employee (salaried) and you select “Current Time Card,” you will receive an Error message: “You aren’t currently set up to use this page. Ask your manager to provide you with a responsive UI layout.” As an exempt (salaried) employee, you won’t have a Current Time Card and you don’t need to speak to your manager or Payroll.
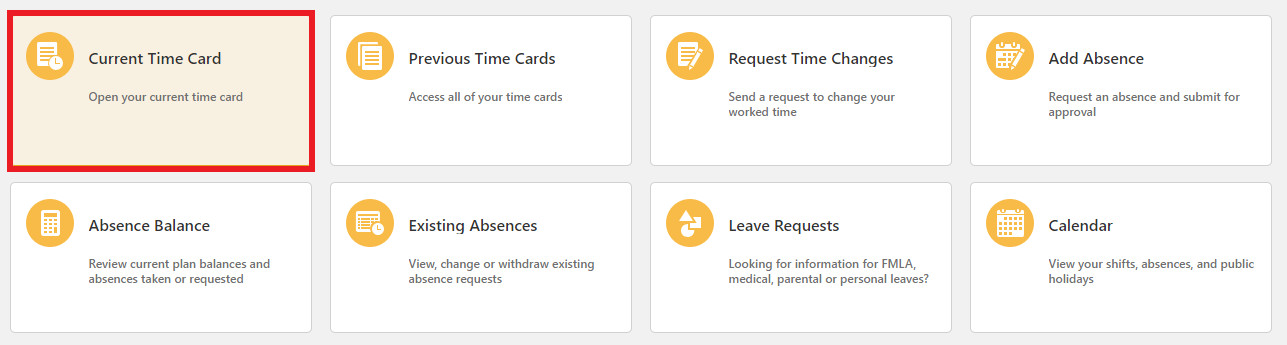
Your current timecard will appear in a spreadsheet format.

If you have more than one Assignment (job), double click on the assignment name to view the dropdown menu and select the assignment for which you are entering hours.
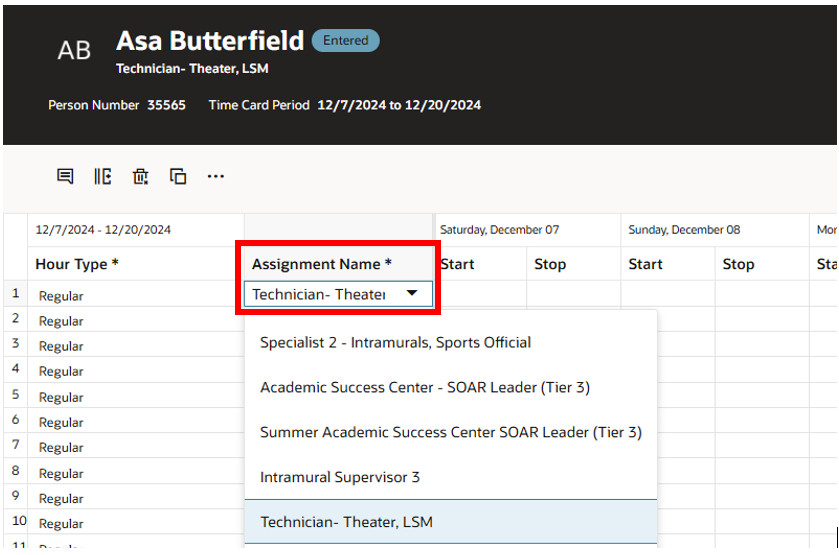
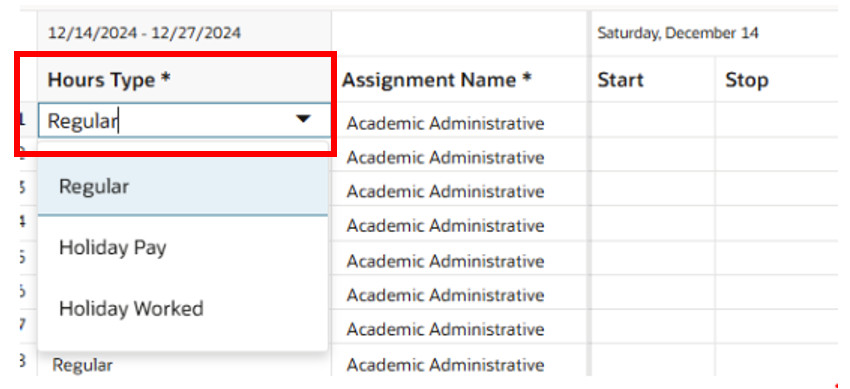
After selecting your Assignment, double click in the “Hours Type” field to view the dropdown menu.
Staff will see “Regular,” “Holiday Pay,” and “Holiday Worked.”
Students will have only “Regular.”
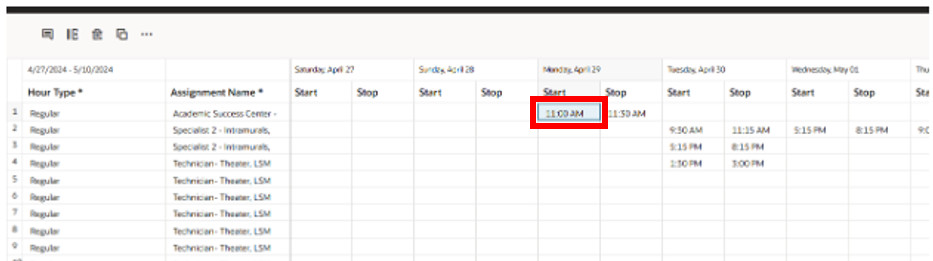
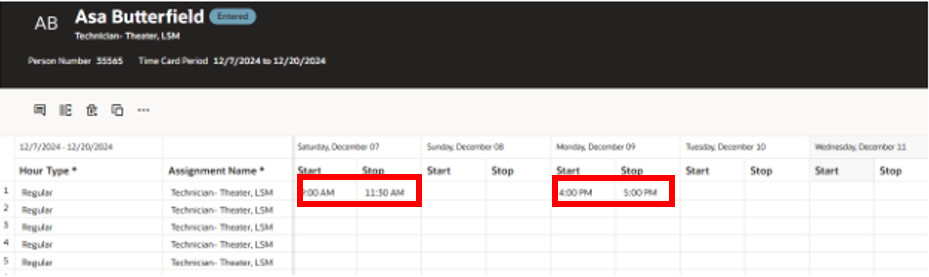
Find the date(s) for which you’d like to enter time. Then add the “Start” and “Stop” times of your shift. Enter the hours of the time worked. Leave a space between the last digit and the “AM” or “PM.”
Example: 9:00 AM.
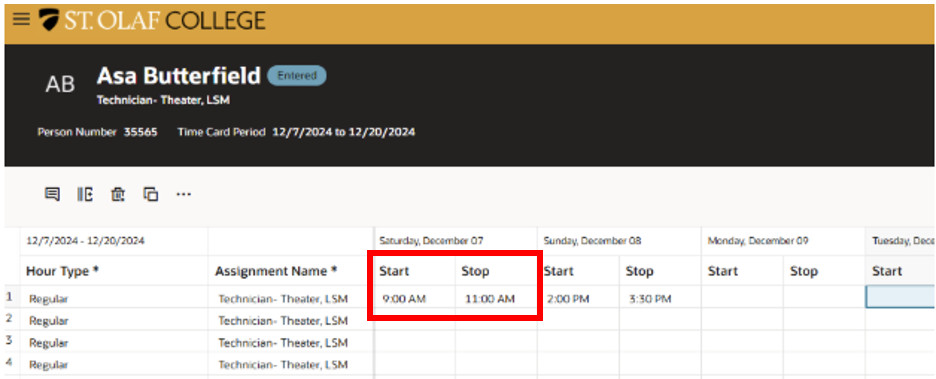
If you need to enter a lunch break, you will need to make an additional entry on the line below your first entry.
Example: You worked from 8:00 AM – 12:00 PM, took an hour break for lunch, and then worked from 1:00 PM – 5:00 PM.
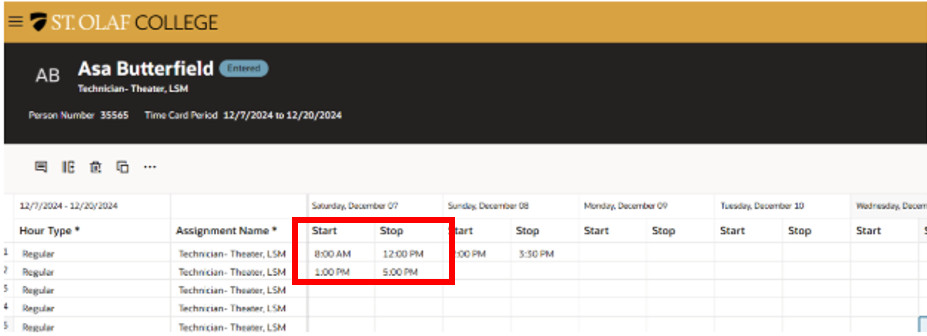
Following the instructions above, enter your Start Time and Stop Time for the afternoon hours worked.
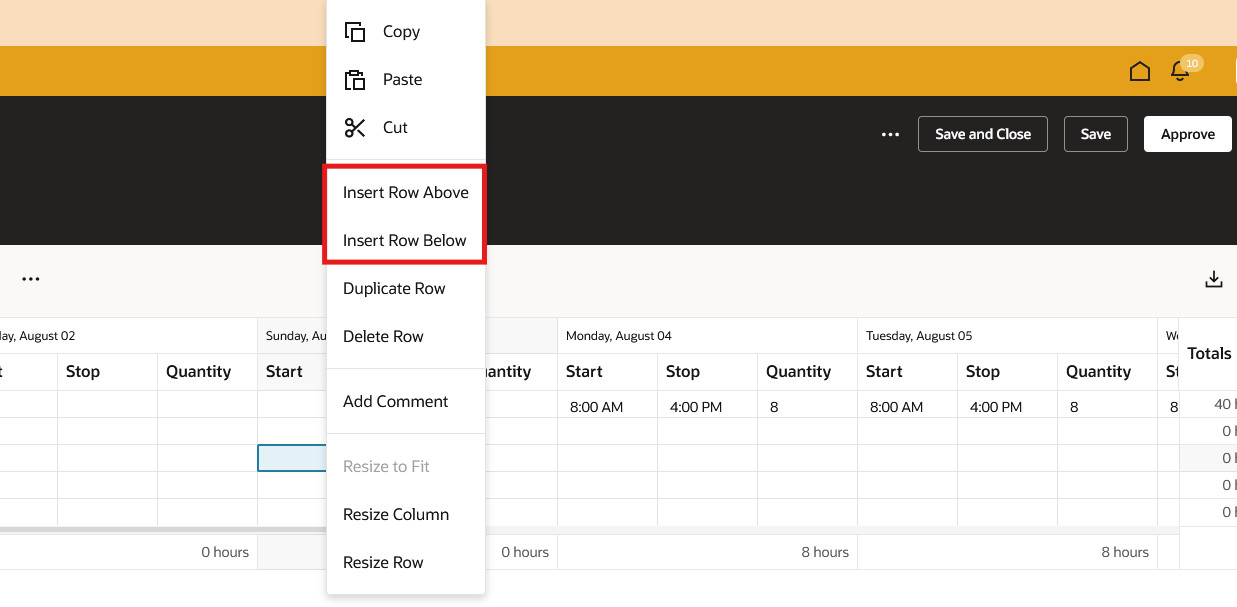
If you need additional lines in your timecard, right click anywhere in the table and select insert row above or below.
If you typically work the same shift during every pay period, you can copy a previous time card instead of reentering all of your time for each pay period.
Click the Copy icon above “Hour Type.”
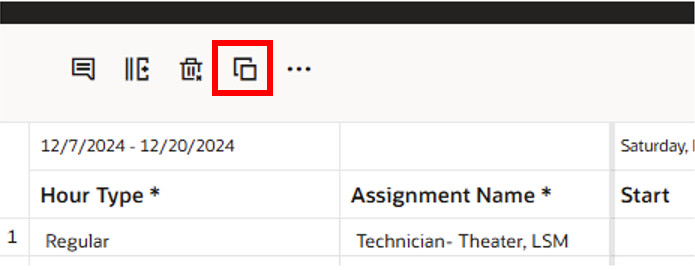
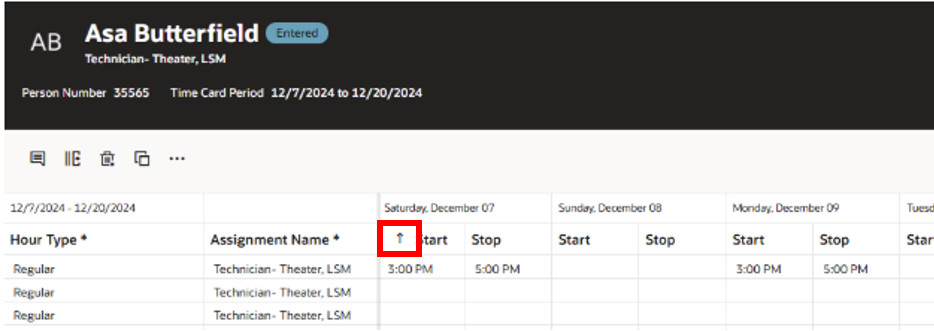
Your previous timecard hours will populate at the bottom of the spreadsheet. Use the Sort feature to move it to the top.
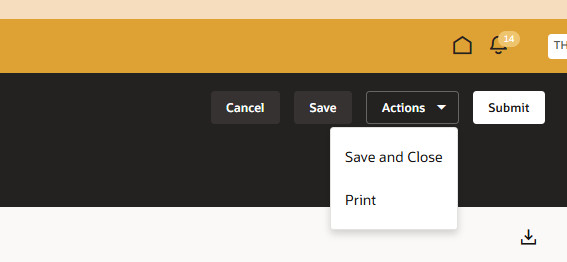
Once you have made your entries, click “Actions,” and then choose “Save and Close.”

Note: Do not click “Submit” if you plan to add more time to your Current Time Card. If you click “Submit,” the system will send the time card to your Supervisor for approval.
Click “Submit” ONLY at the end of a pay period. You do not want to bother your supervisor with daily requests to approve your timecard.
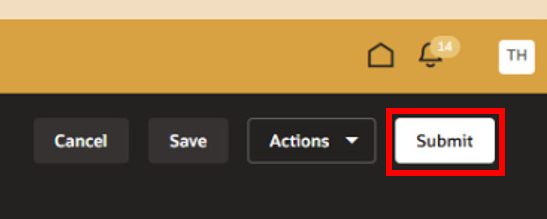
If you accidentally clicked “Submit,” you will still be able to make changes to your current timecard, but you will need to resubmit at the end of the pay period.
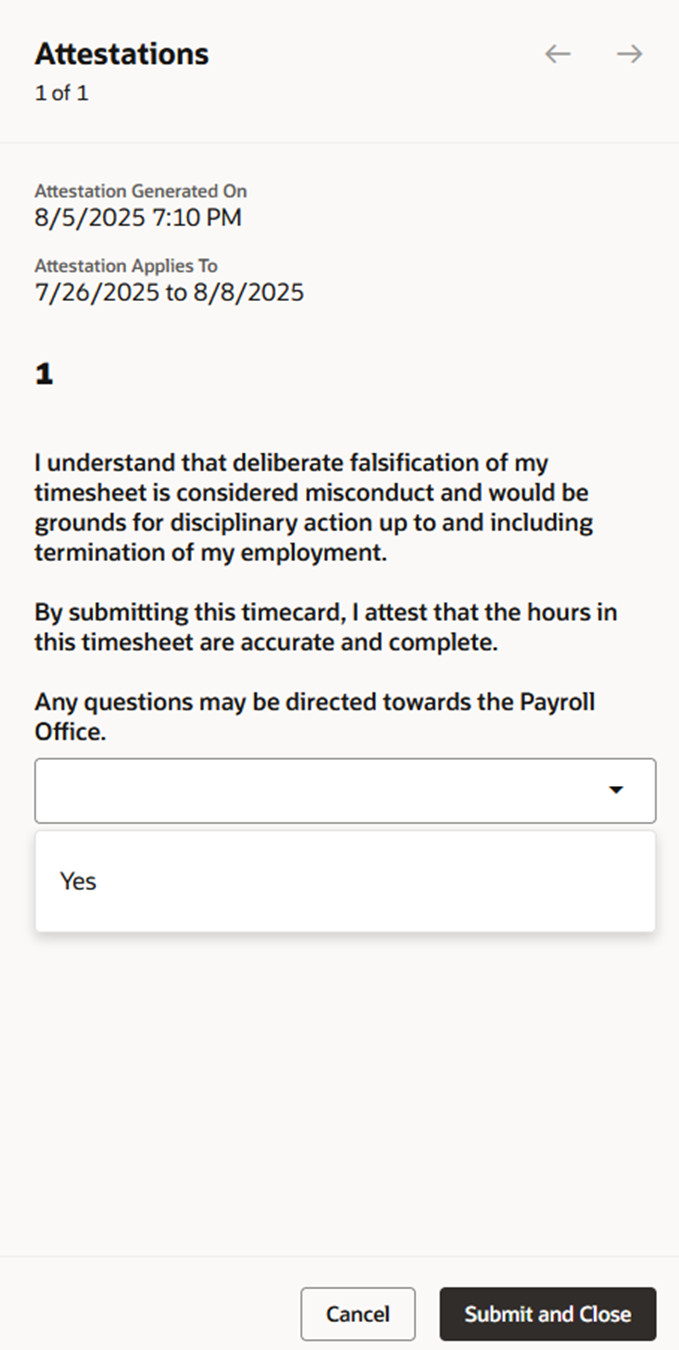
Before your timecard goes out for approval, you will be required to select “Yes” and “Submit and Close” on the following statement. Timecards that are not submitted with the attestation statement will not be approved or paid timely.
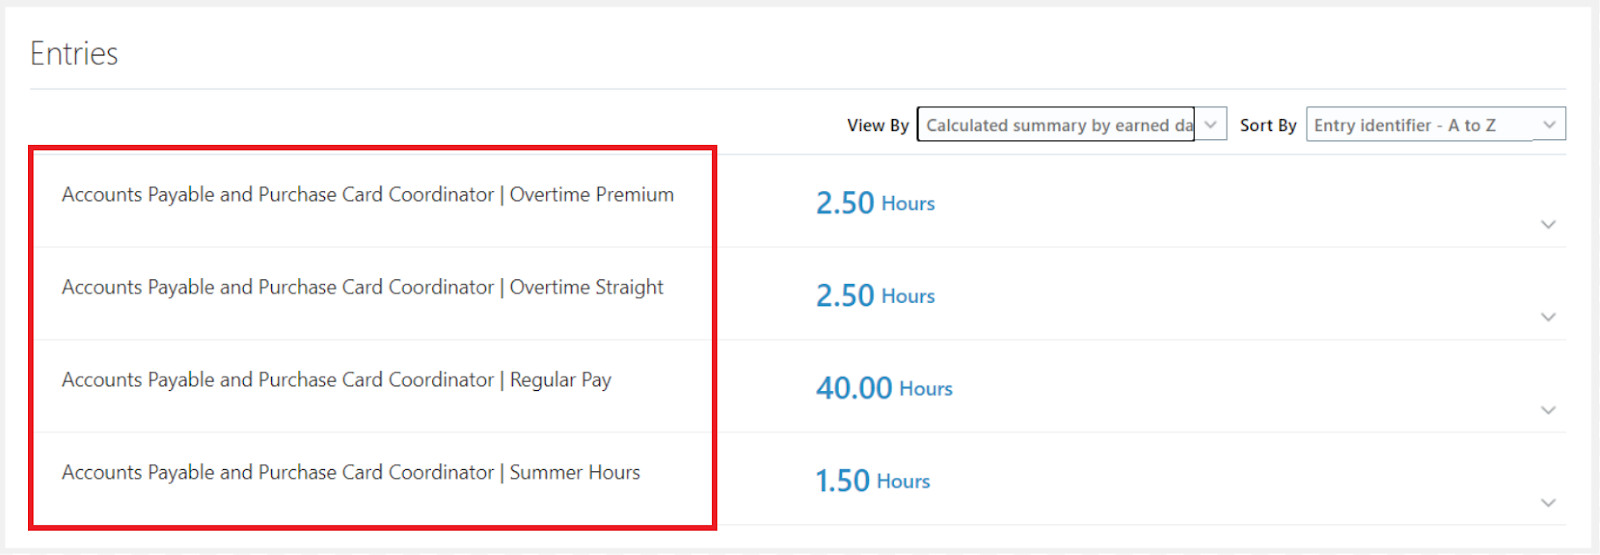
Once you have entered your time, Oracle will factor in approved Absences for the pay period. The system will also factor in any Overtime.
In Oracle, Overtime is split into “Straight” and “Premium,” and when combined Overtime will be 1.50 x your hourly rate.
Oracle will also automatically calculate “Summer Hours.” You no longer need to enter different hours during the summer.
Updating Submitted Time Cards
When you are reviewing a Time Card that you’ve already submitted and that was already approved, use the Pencil icon to make corrections.
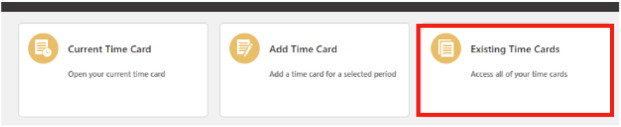
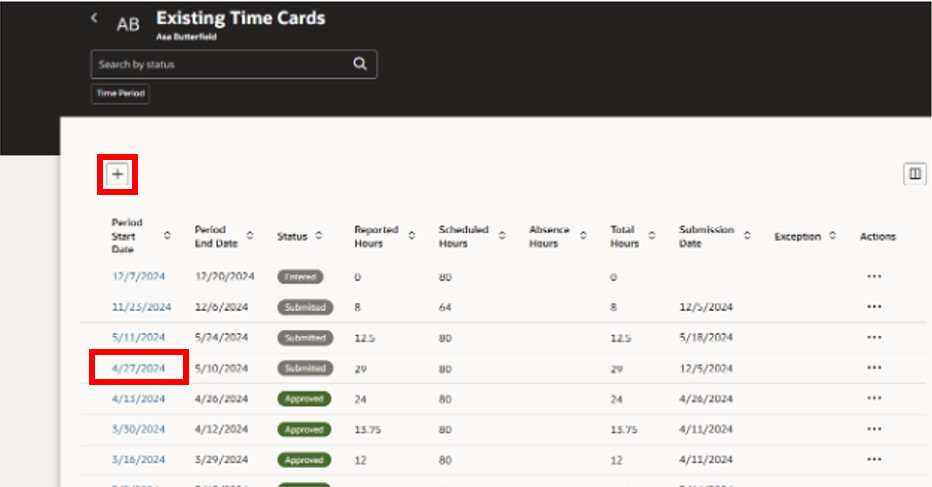
Click on “Existing Time Cards.”
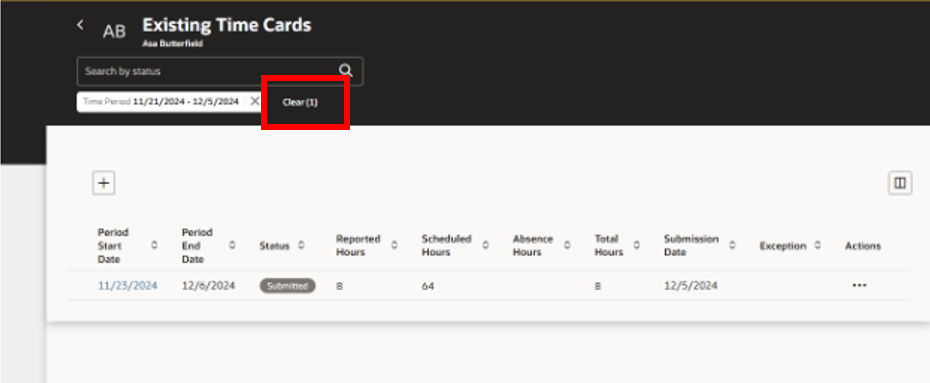
If you only see one timecard, clear the filter to show all.
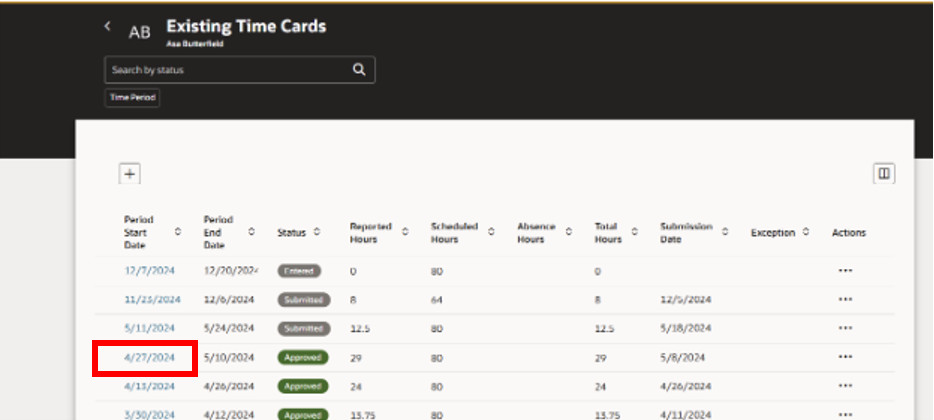
Click on the date of the timecard you need to change.
Make the necessary corrections to your timecard. Right click in the cell for the date and time of the affected change if you need to add a comment.
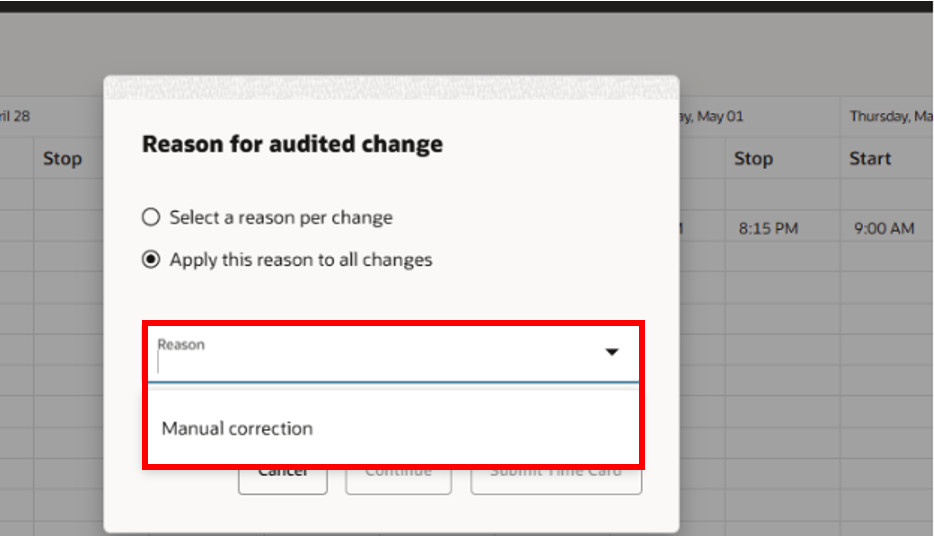
When you submit your Time Card, the system will ask you for a “Reason for audited change.”
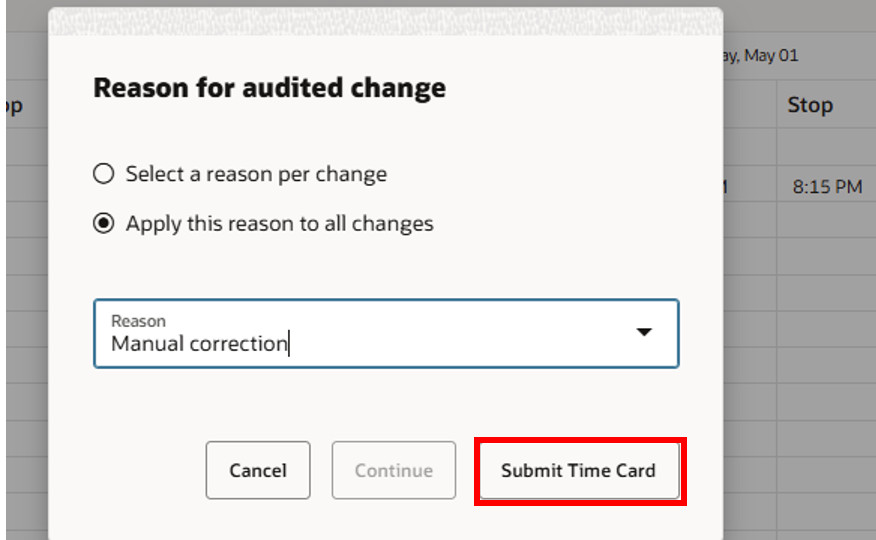
Click on “Manual correction,” which is your only option for both “Reason” fields.
Click Submit Timecard in the lower right of the popup. Your time card will then go to your supervisor for approval.
Updating Missed Time Cards
Click on “Existing Time Cards.”
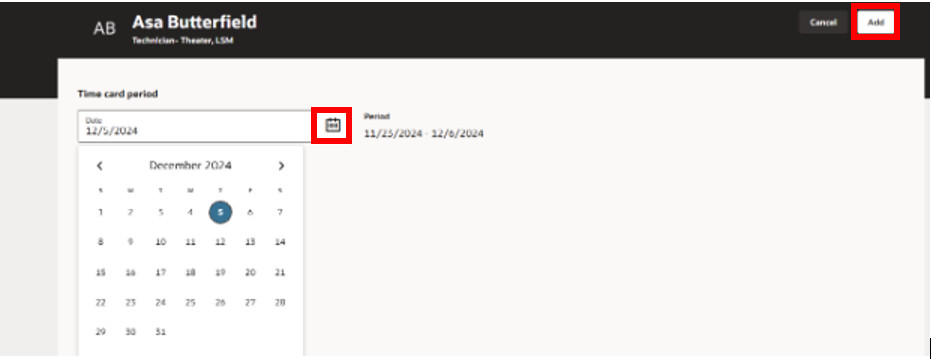
Click on the date of the timecard you need to access, or select “Add” if you do not yet have a timecard created for the affected pay period.
Use the calendar icon to choose the date you need to enter. Once that is selected, click “Add” in the upper right of the screen.
Input the time for the period that you have selected.
Once you have made your entries, click “Actions,” and then choose “Save and Close.”
Note: Do not click “Submit” if you plan to add more time to your Current Time Card. If you click “Submit,” the system will send the time card to your Supervisor for approval.
Click “Submit” ONLY at the end of a pay period. You do not want to bother your supervisor with daily requests to approve your timecard.
If you accidentally clicked “Submit,” you will still be able to make changes to your current timecard, but you will need to resubmit at the end of the pay period.
Before your timecard goes out for approval, you will be required to select “Yes” and “Submit and Close” on the following statement. Timecards that are not submitted with the attestation statement will not be approved or paid timely.
Comments
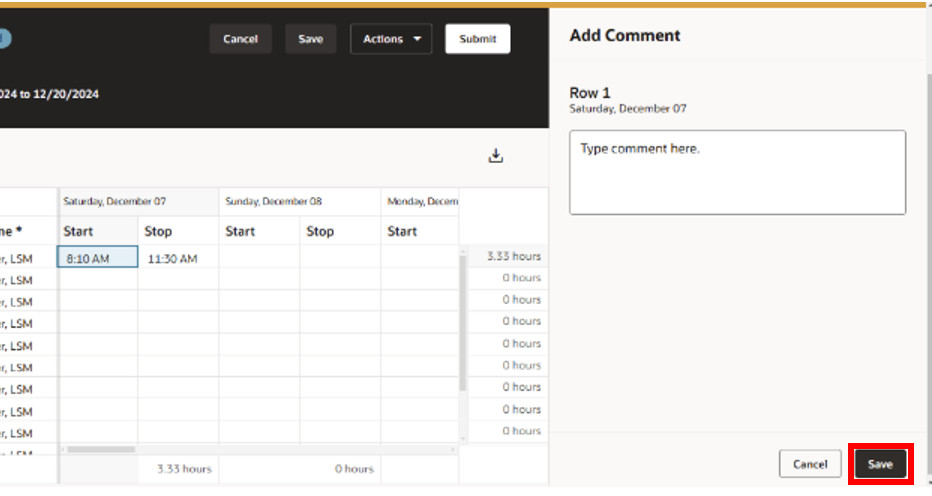
You can add comments to your time card BEFORE you click the “Submit” button.
Once your supervisor approves your time card, you will no longer be able to add comments.
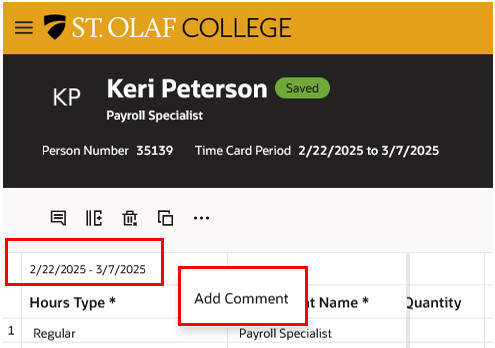
Right click in the cell that displays the date range of the pay period. Select “Add Comment.”
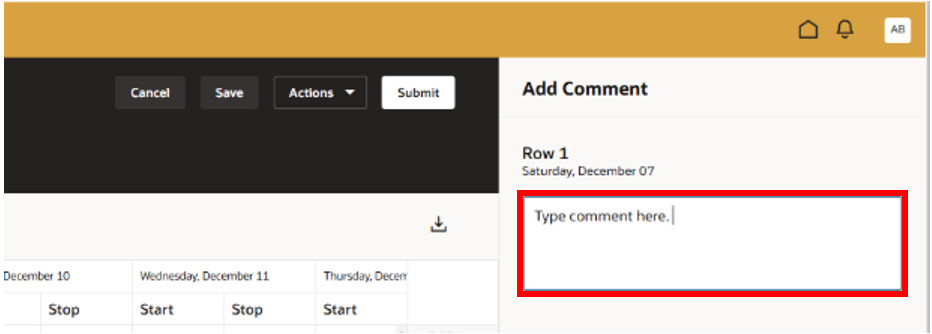
Type your comment in the text box on the right of the screen.
When done, click save in the lower right corner.
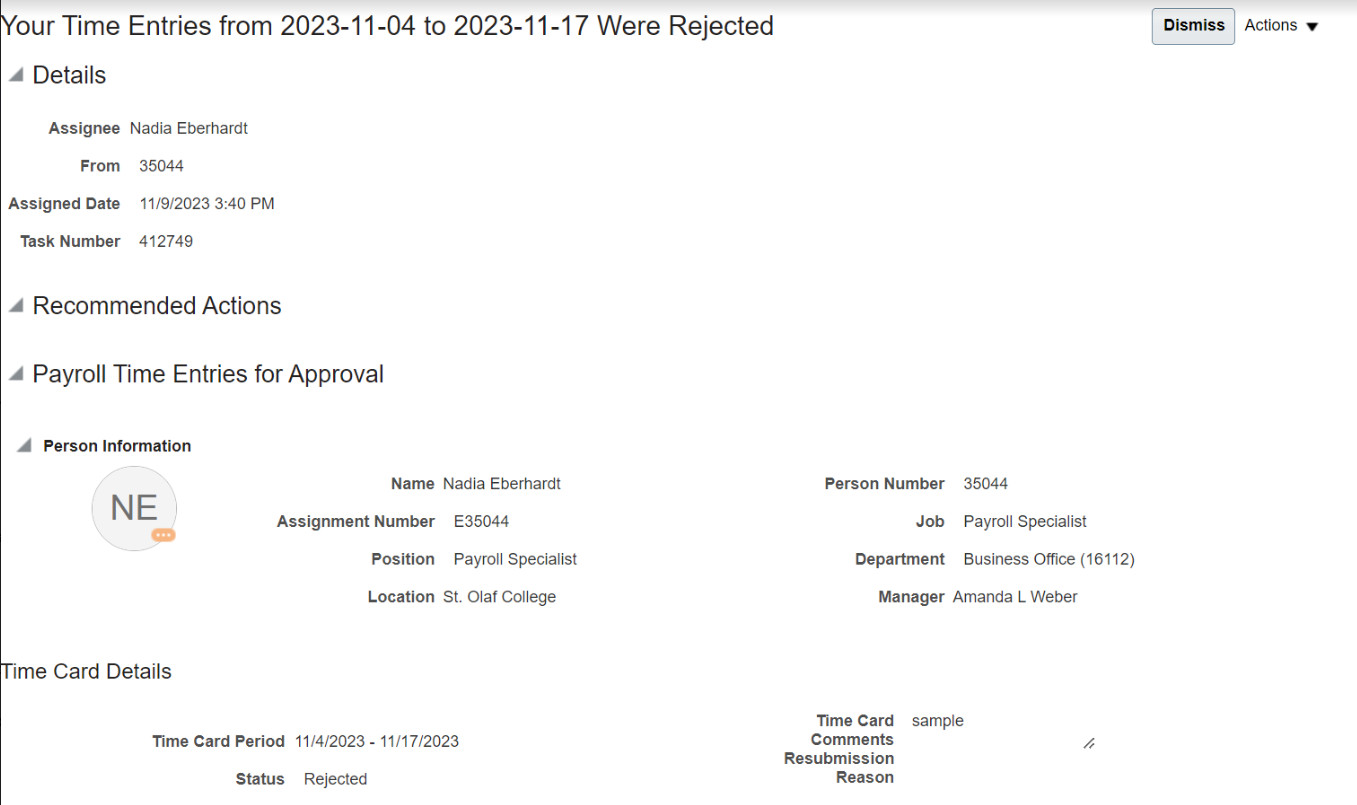
Notification of Rejected Time Card
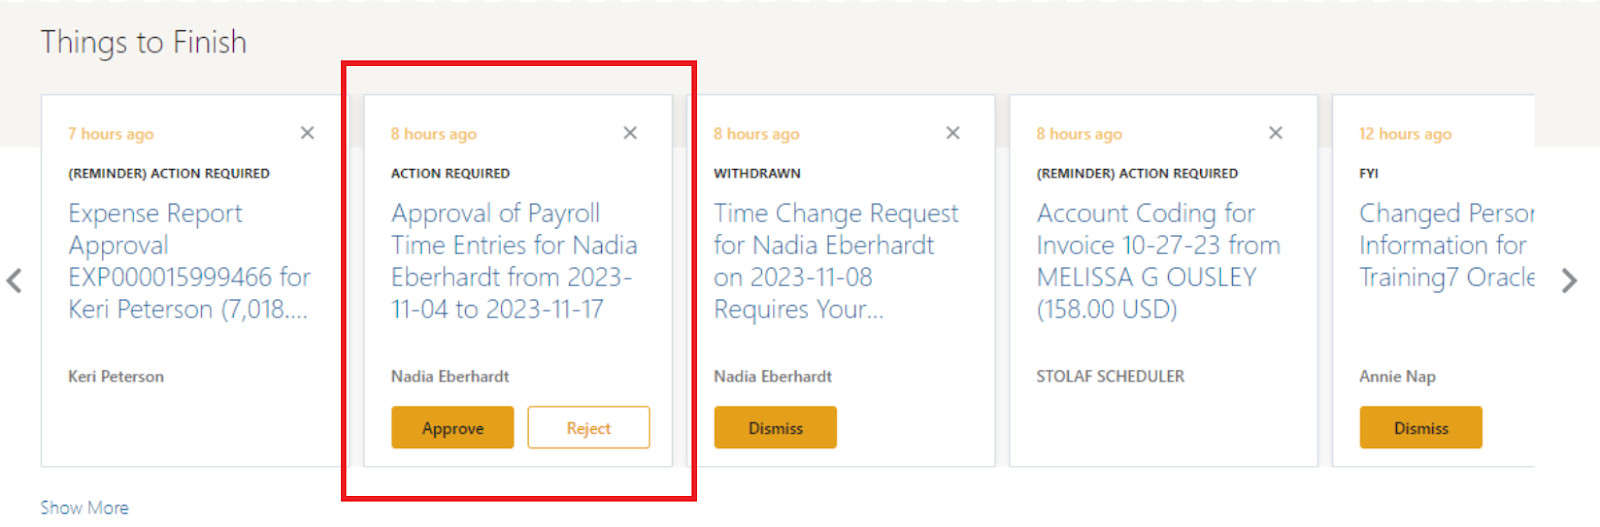
If your supervisor rejects your time card, you will receive a notification like the first one in the window below: “Rejection of PTO Absence Request.”
Click on the notification to view the details of the rejection. You will need to return to Time Entry to review your time card.
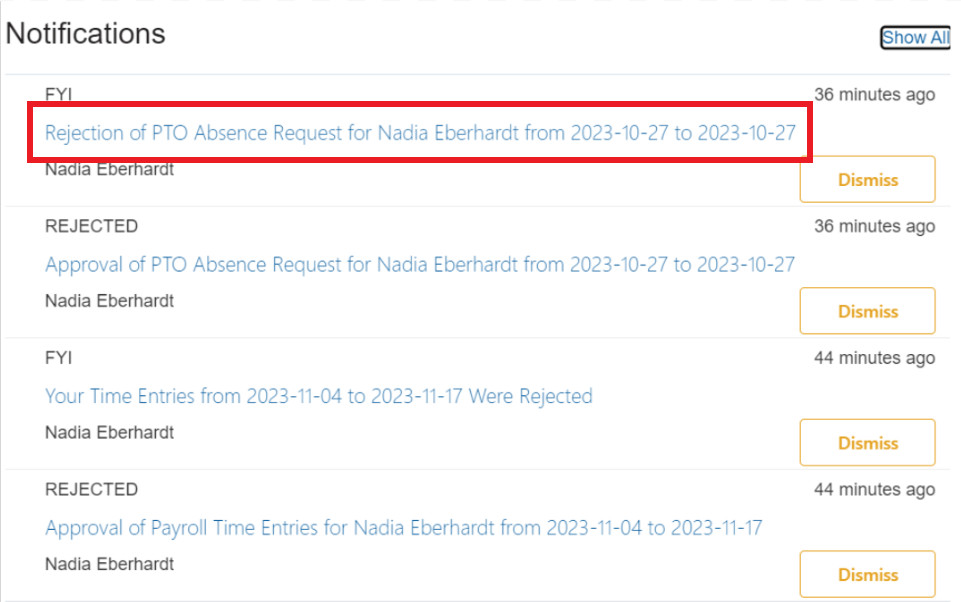
You will need to return to Time Entry to review your time card.
From “Me,” click on the “Time and Absences” tile.
Click on “Current Time Card.”
From “Hours Type,” select “Holiday Pay.”
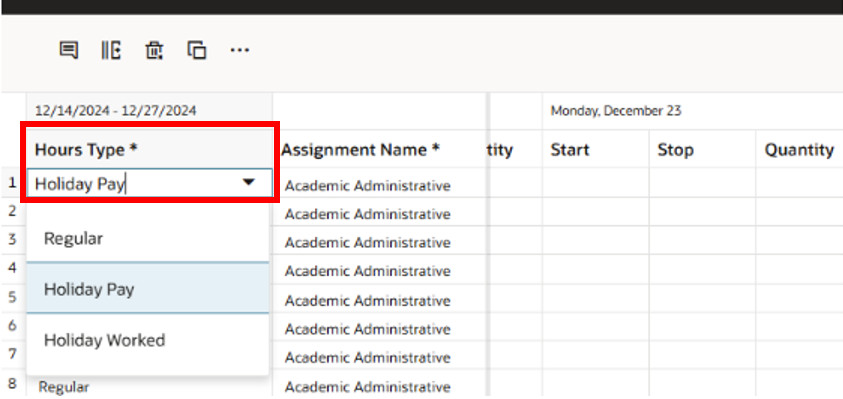
Find the dates of the Holiday. In the Quantity field, enter the number of hours you receive for holiday per day.
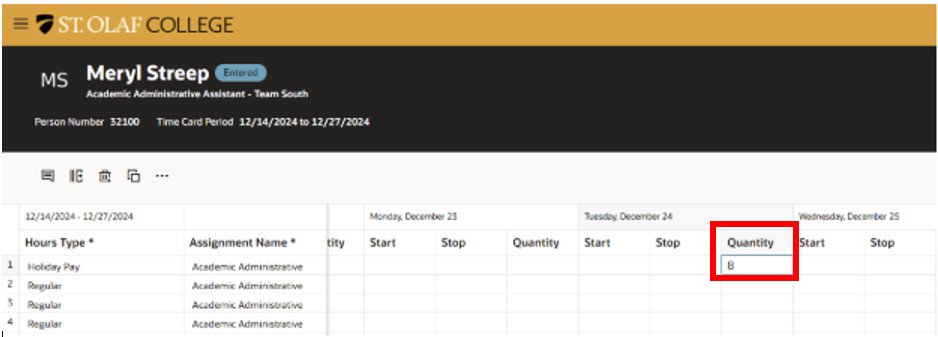
If you are full time you would enter “8”. If you are part time but work full time during this holiday period, you would enter “8”. If you are part time but work year round, you would enter the normal number of hours that you are typically scheduled to work.
Note: Do NOT use the “Start” and “Stop” fields for Holiday Pay.
Once you have entered your Hours, click “Actions,” then “Save and Close.”
Holiday Hours Worked
From “Me,” click on the “Time and Absences” tile.
Click on “Current Time Card.”
Under “Hours Type,” select “Holiday Worked” and navigate to the dates of the holiday. For any time Holiday Worked, you need to enter the “Start” and “Stop.”
Note: Do NOT use the “Hours” field for Holiday Worked.
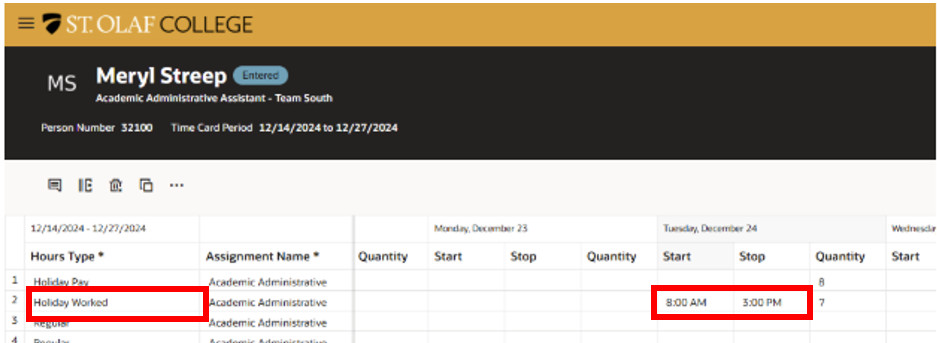
Then click “Save and Close” if the pay period has not yet ended, or click “Submit” if you have completed the pay period.
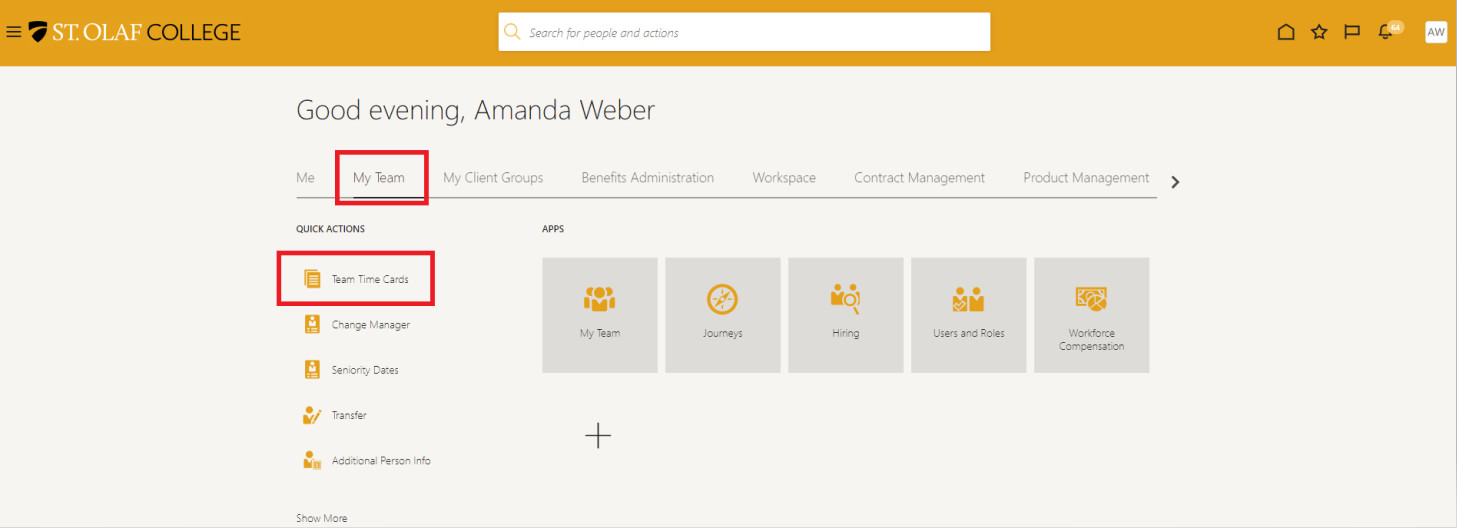
Choose “My Team.” Under “Quick Actions,” click “Team Time Cards.”
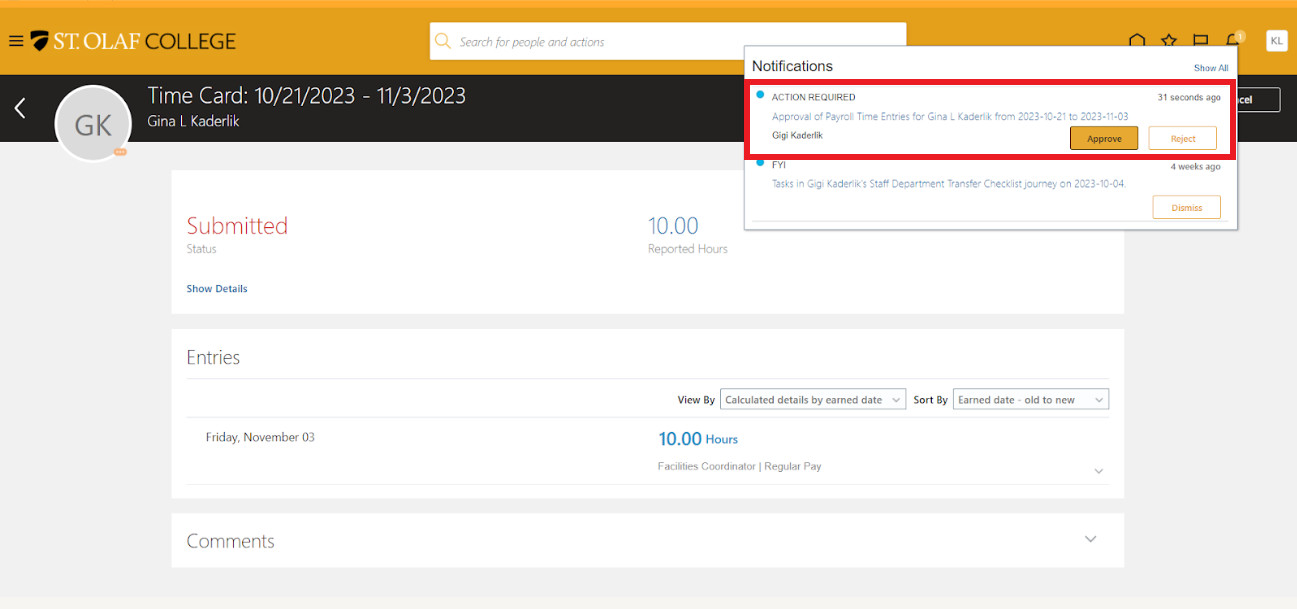
You will see a notification that you need to approve time cards.
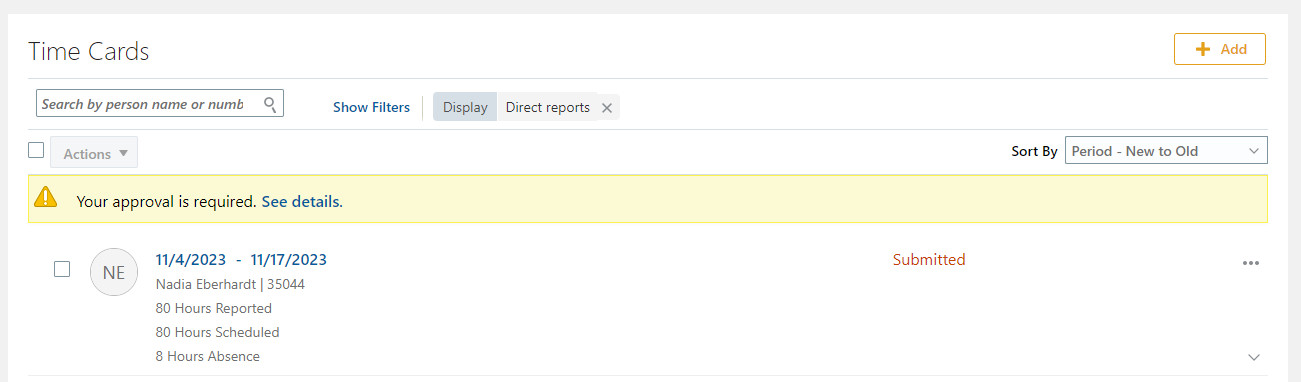
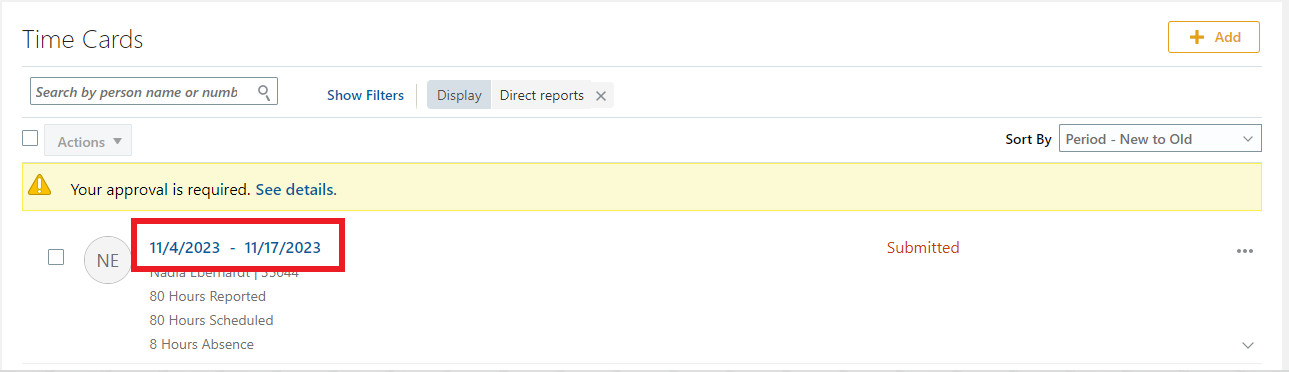
Click on the linked pay period for the time card that the employee submitted.
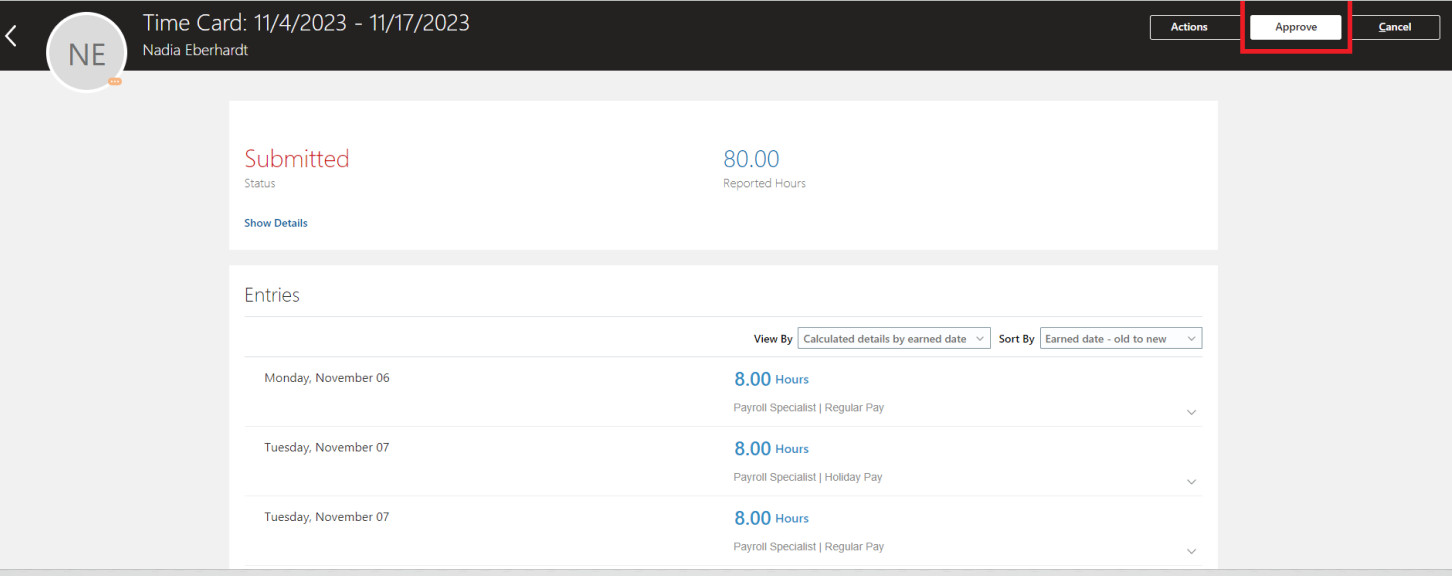
Review the time card. If the information is accurate, click the “Approve” button at the top right corner of your screen.
If the employee needs to change the time card, click on “Actions,” and from the dropdown menu, click “Reject.” At this time, Oracle does not allow for a reason for the rejection. Please email your employee to provide any additional information until a resolution is released.

If you reject the time card, your dashboard will display a number above the word “Rejected.”

You will also receive notifications to approve time cards through your bell icon or on the tasks on the bottom of your dashboard under “Things to Finish.”
Delegating Approvals
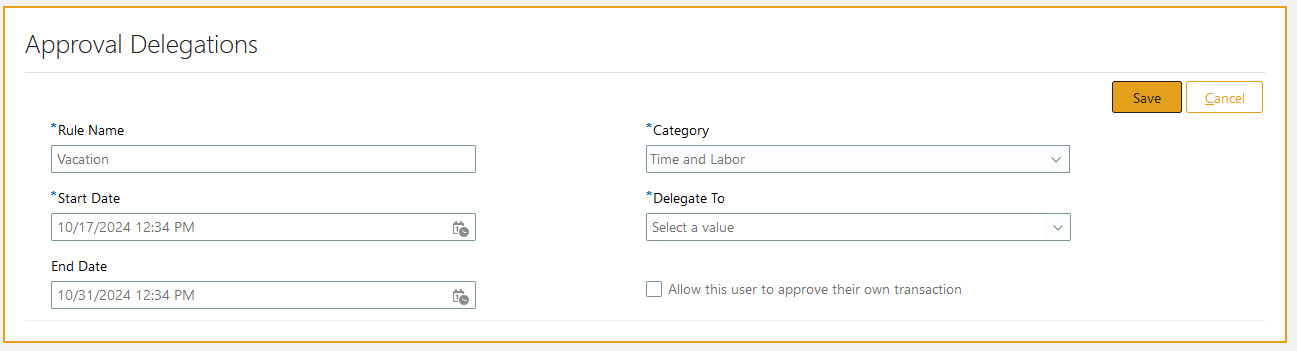
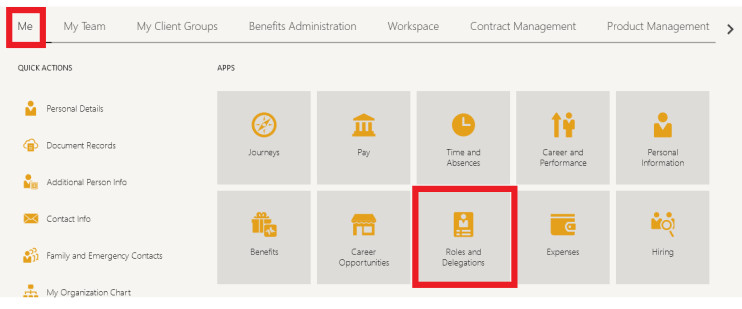
Choose “Me.” “Roles and Delegations”.
Scroll to the very bottom of the page and expand the Approvals section.
Do not delegate your role, this means the individual you are delegating to would be allowed to view anything in your personnel profile.

Once expanded, click “Add”.

You can make a “Rule Name” whatever you want it to be (My vacation, winter break, etc.).
Select the start date and if applicable end date as well. The category for time cards is Time and Labor, however this can be used for other approvals. Delegate to can be whomever you wish.
Be sure to save when done.